"Step-by-Step Guide to Creating a Windows Server on AWS and Installing IIS to Host Your Website"


Are you looking to create a Windows Server on AWS and host your website using IIS? Look no further! In this comprehensive guide, we will walk you through the entire process, from setting up your AWS account to installing IIS and creating your first webpage. Follow our step-by-step instructions.
Step 1: Sign in to AWS Management Console
Create an AWS Account If you don't already have an AWS account, Sign in to AWS Management Console

Step 2: Create a New Instance
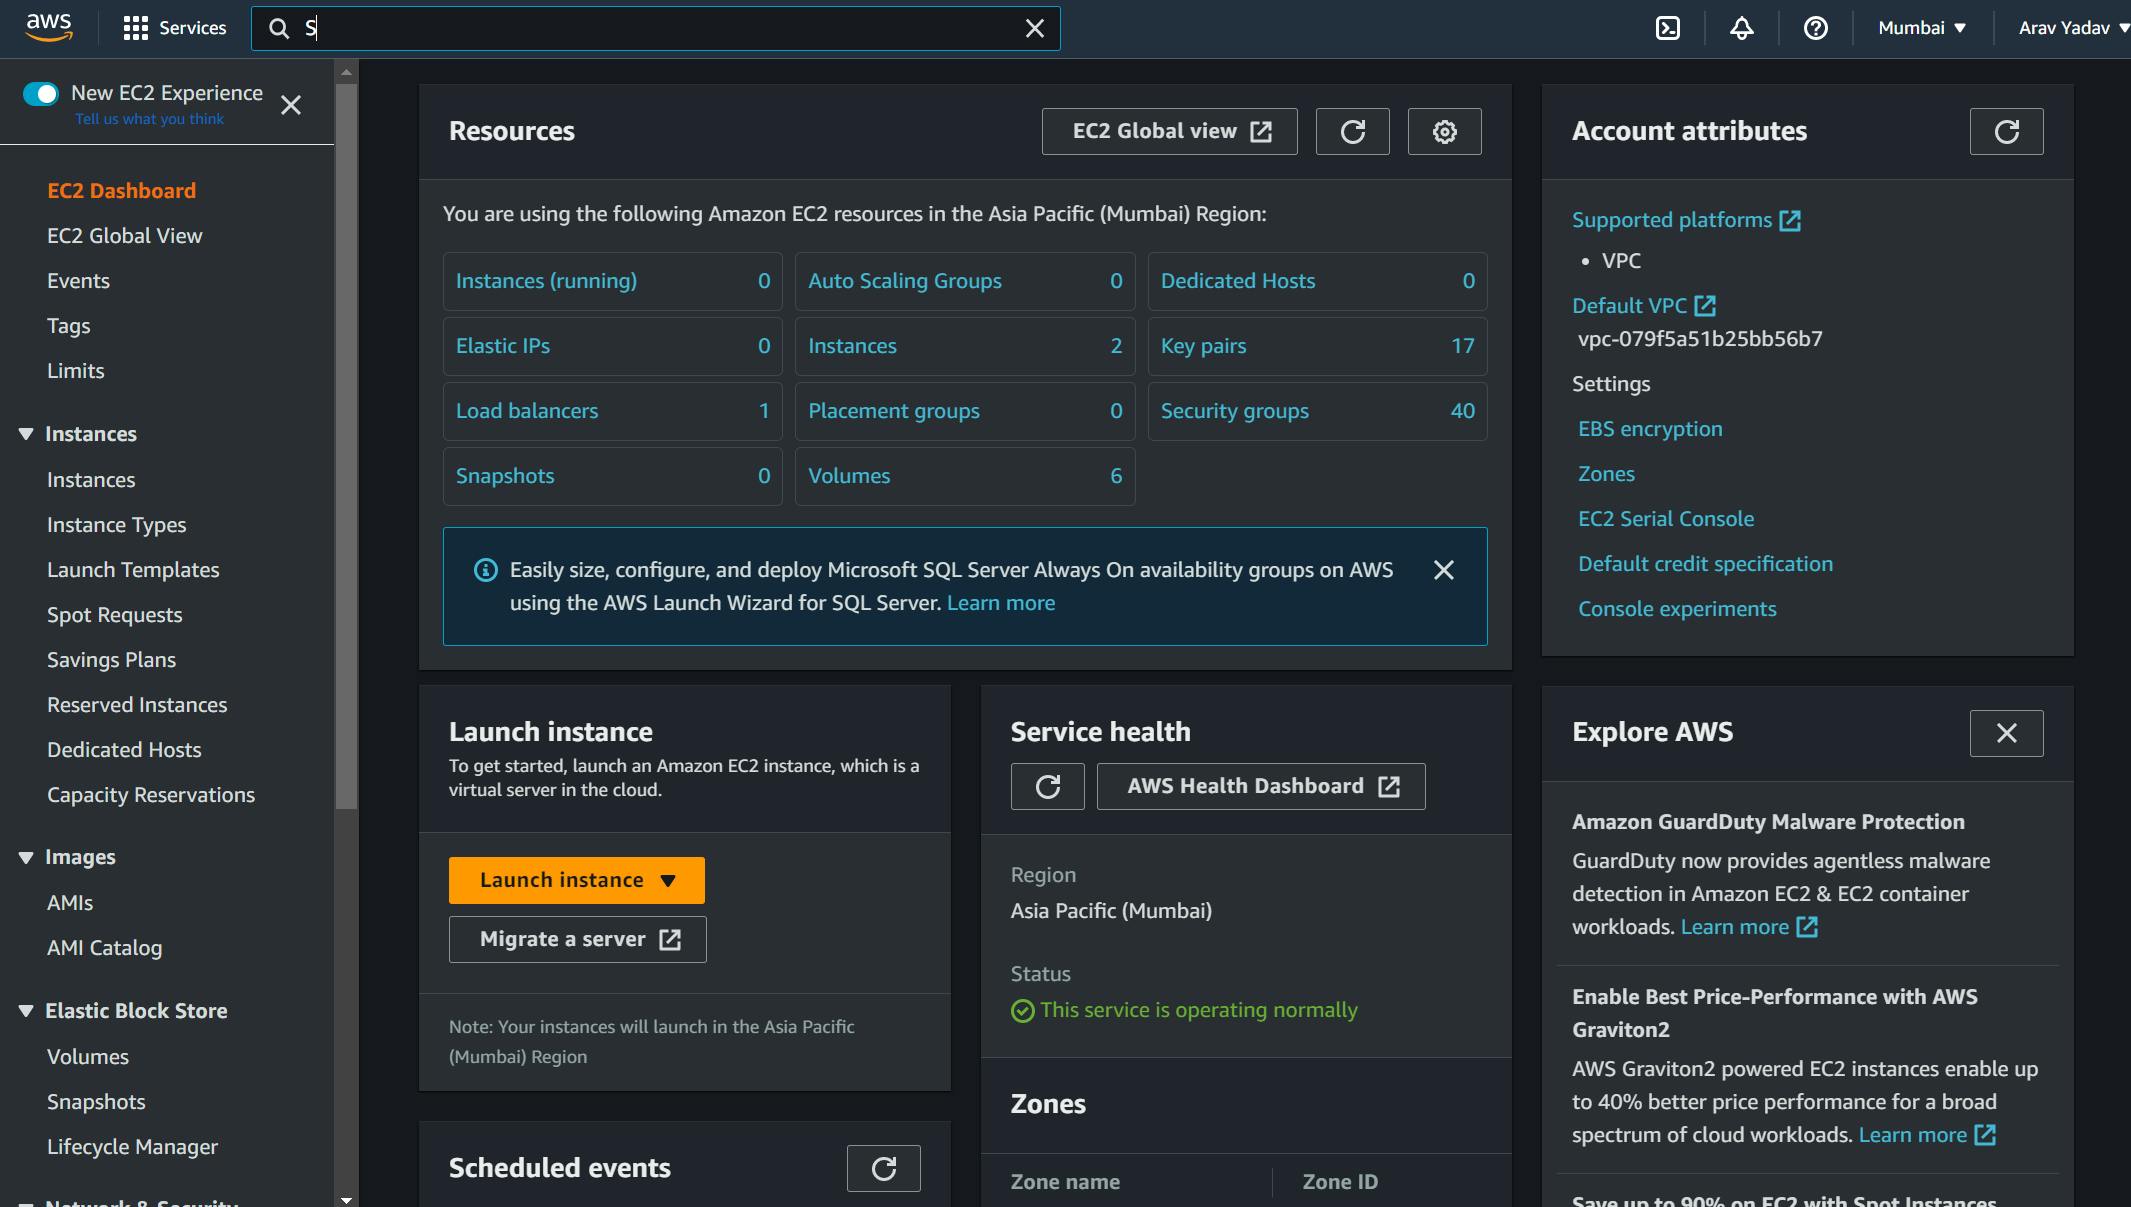
Go to EC2 Dashboard and create a new instance in the AWS Management Console. To do this, navigate to the EC2 service in the AWS Management Console, and click on "Launch Instance"
c
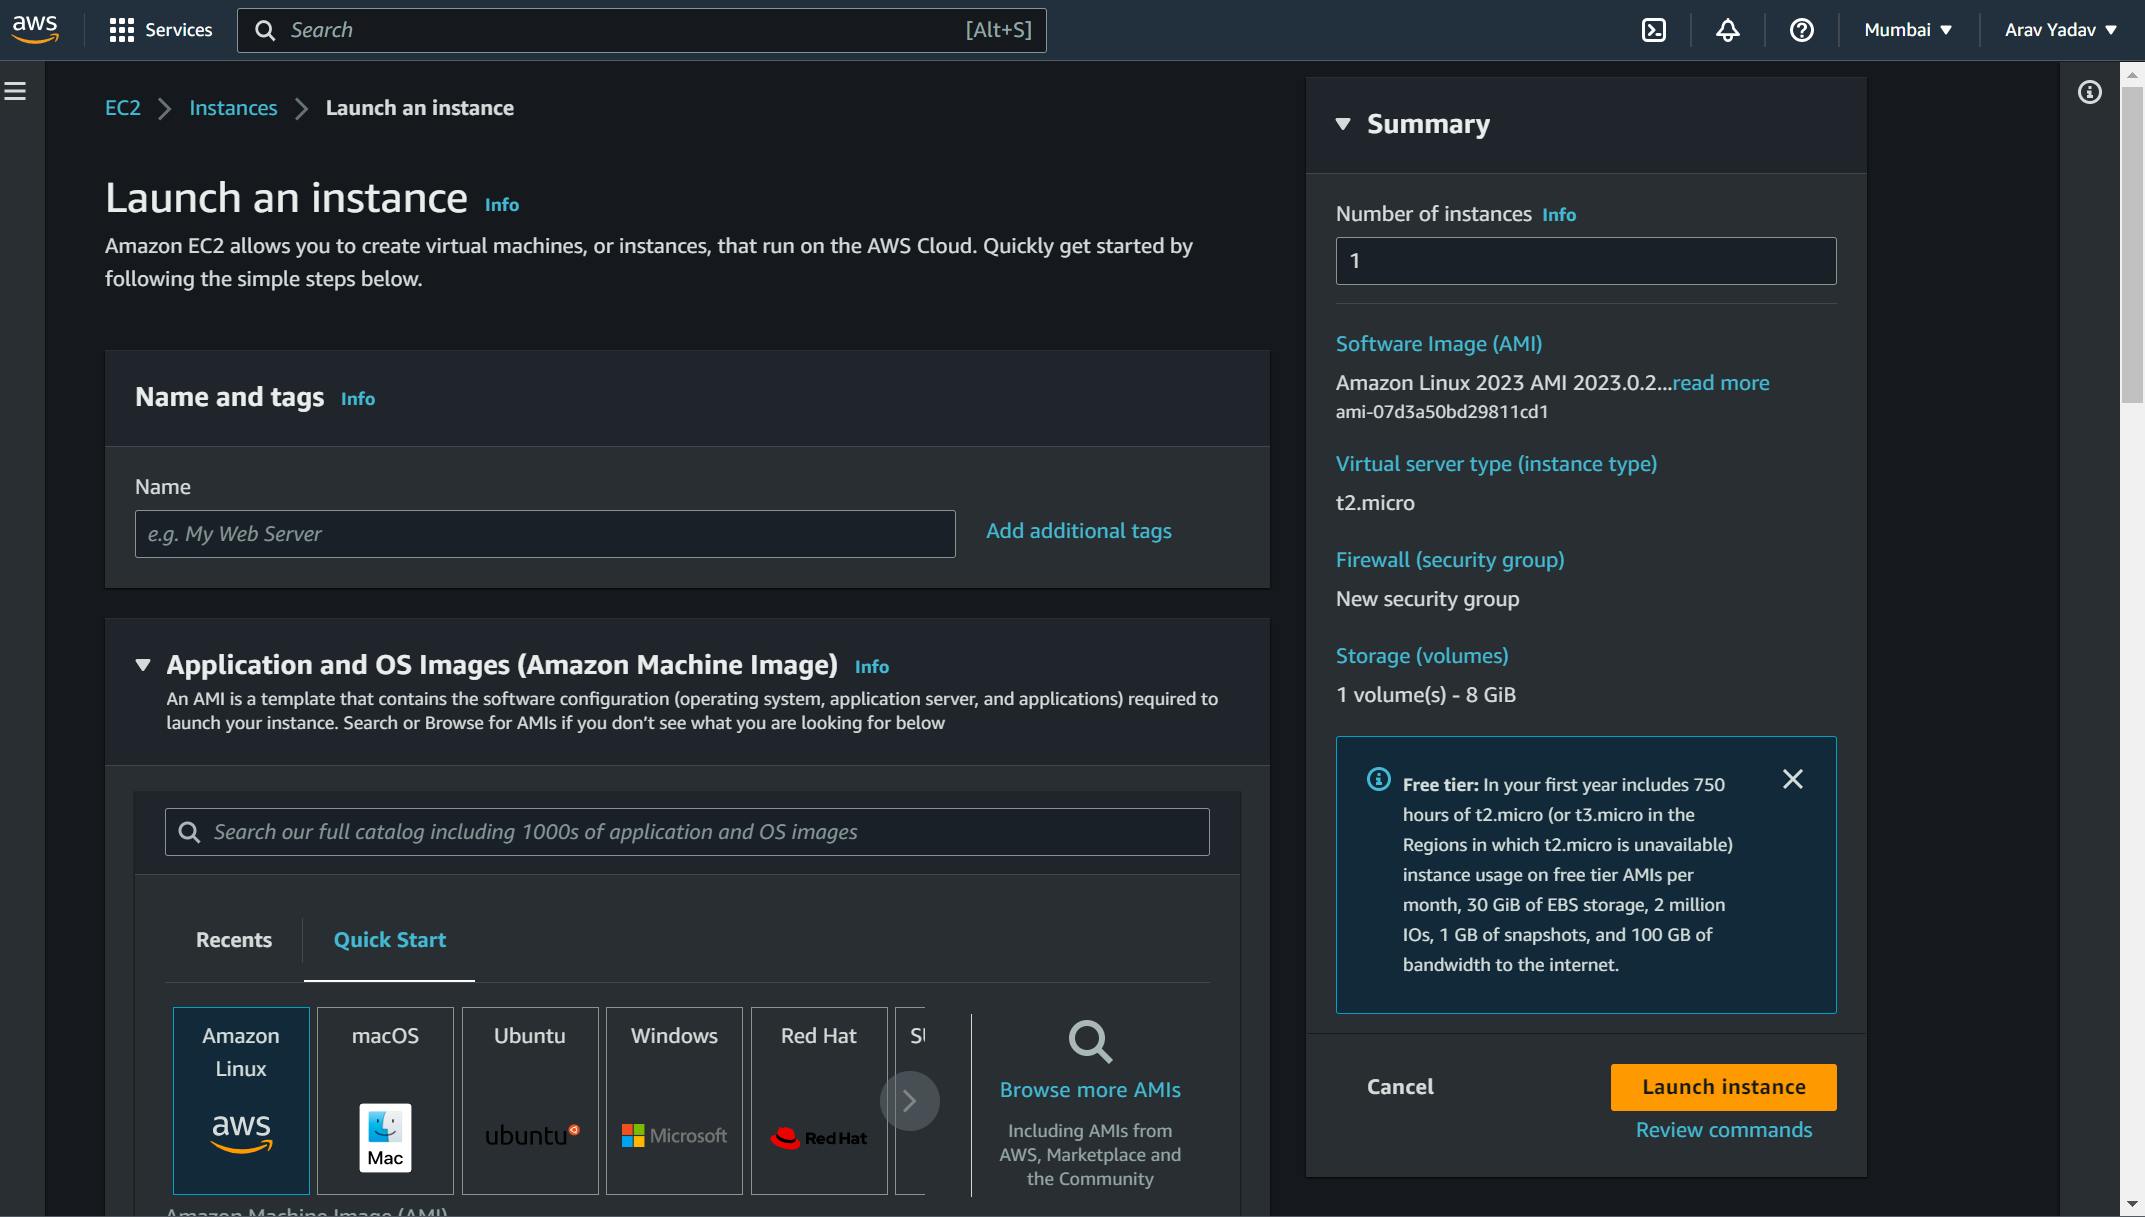
Step 3: Enter the name of the instance -> Select AMI(Windows)
Choose an Amazon Machine Image (AMI) Select the version of Windows Server that you want to use. AWS provides several pre-configured AMIs for Windows Server, which can be found in the AWS Marketplace. Choose the one that suits your needs and click "Select".
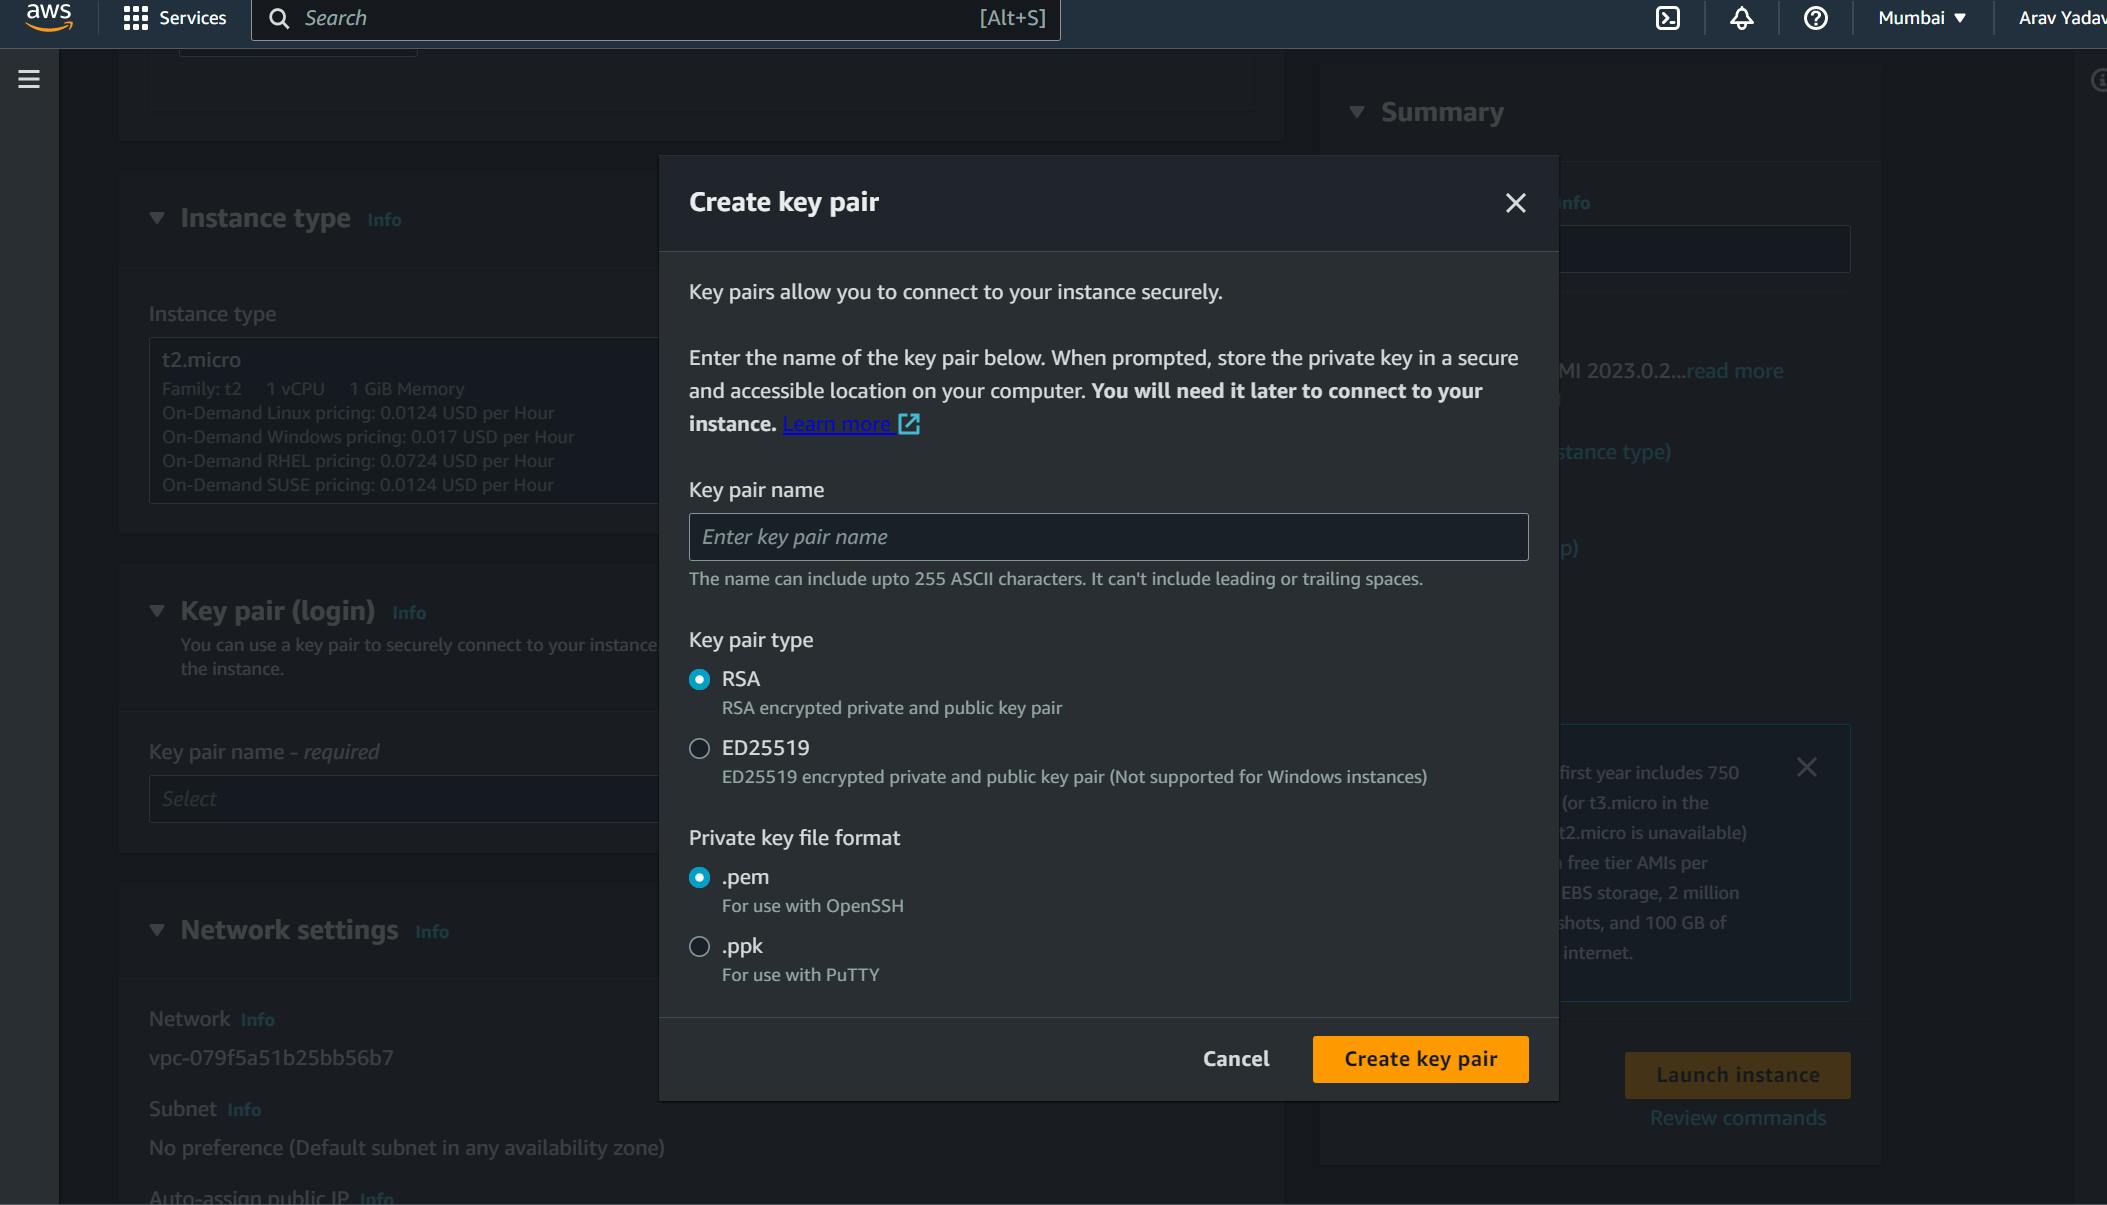
Step 4: Create a New Key Pair
Create a Key Pair To access your Windows Server instance, you will need to create a key pair. This will enable you to securely connect to your server using an SSH client. Follow the on-screen instructions to create a new key pair
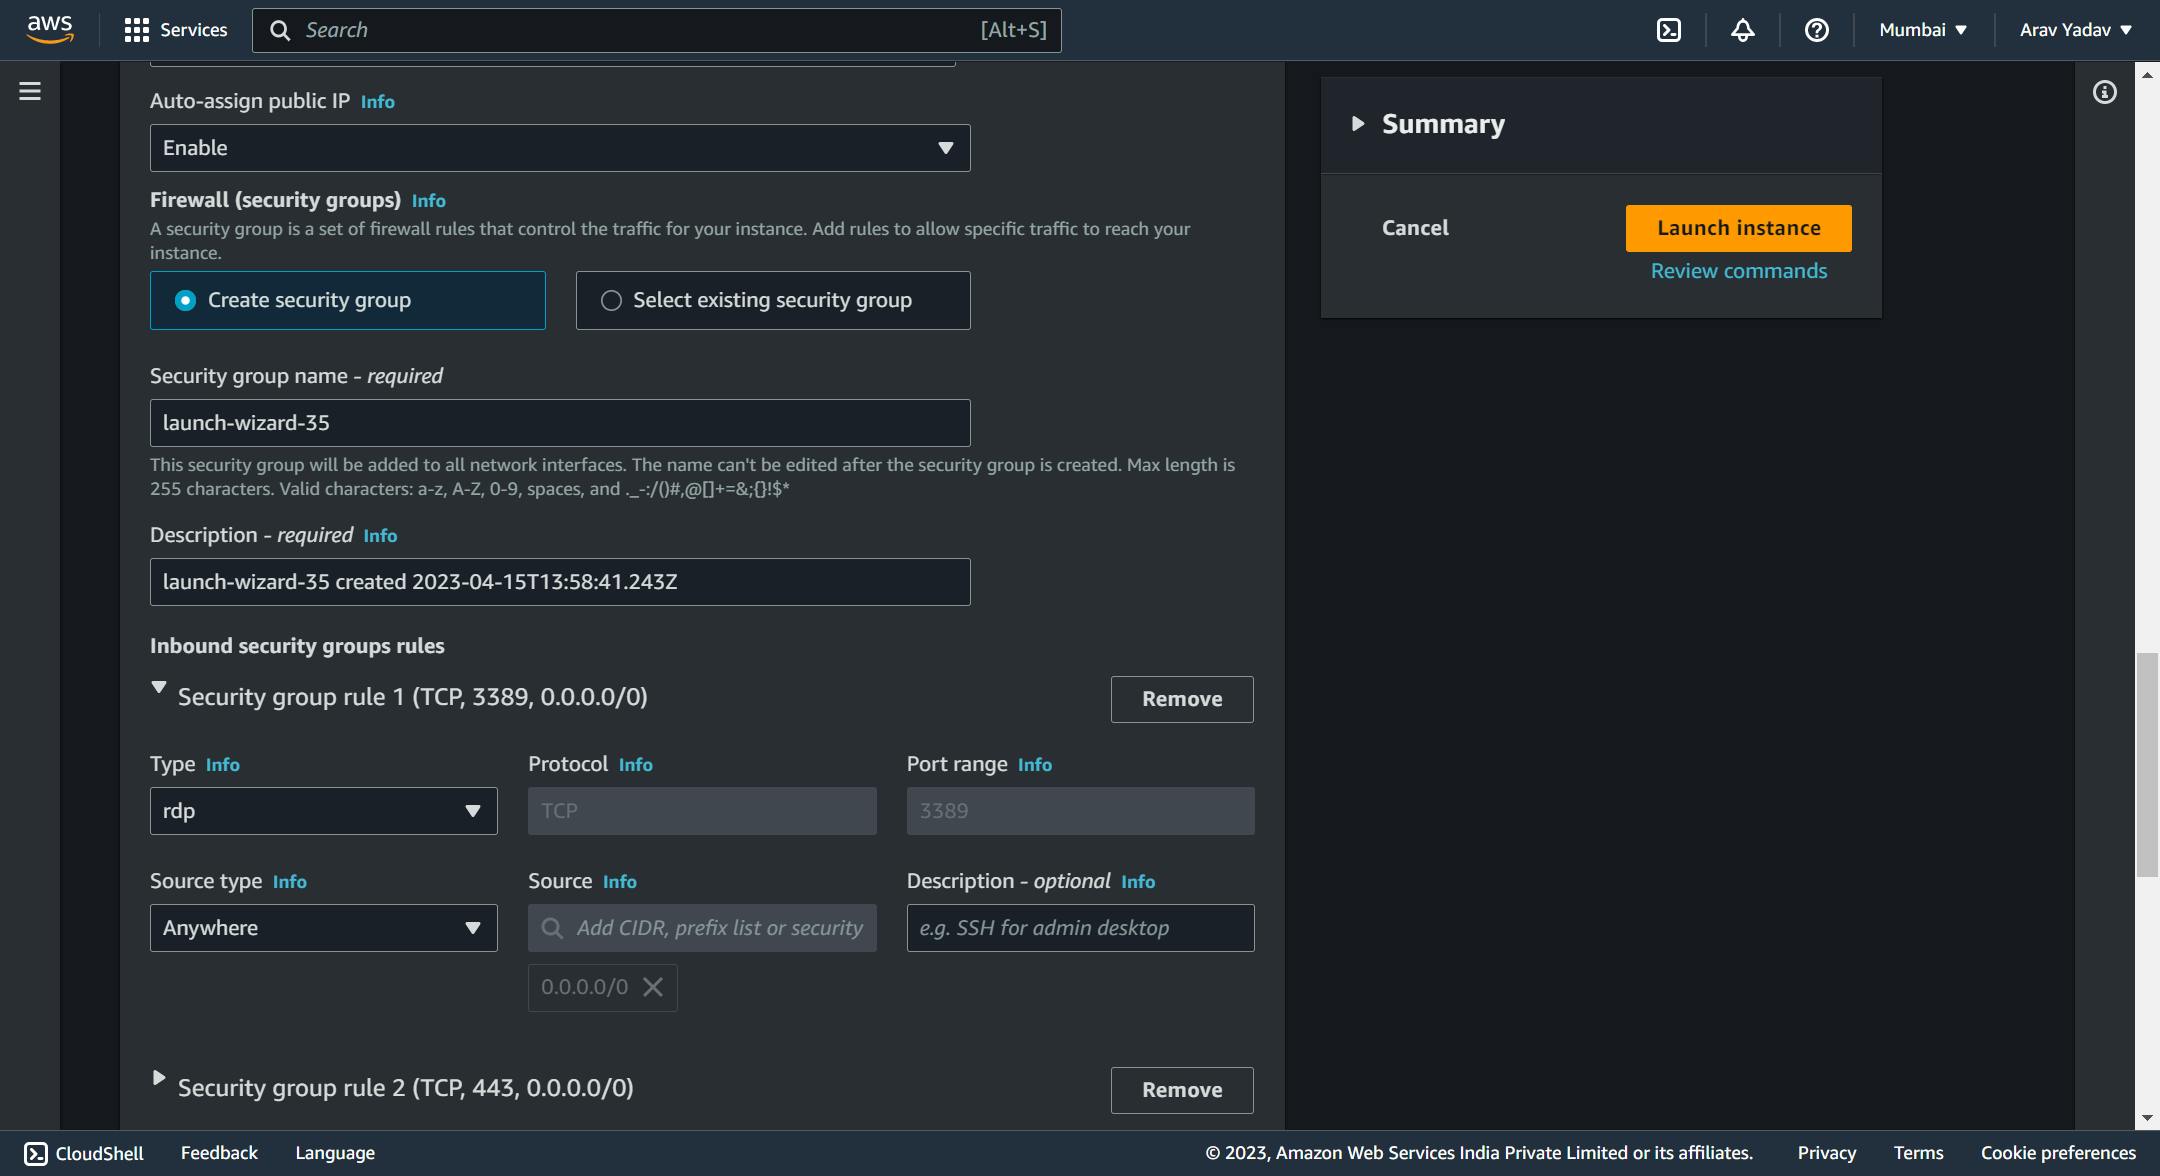
Step 5: Configure the Security Group
A security group acts as a virtual firewall for your instance. In this step, you can configure the security group settings to allow or deny incoming and outgoing traffic.
Configure the security groups to allow RDP access to the instance. You can create a new security group or use an existing one. Ensure that the RDP port (3389) is open in the inbound rules of the security group.
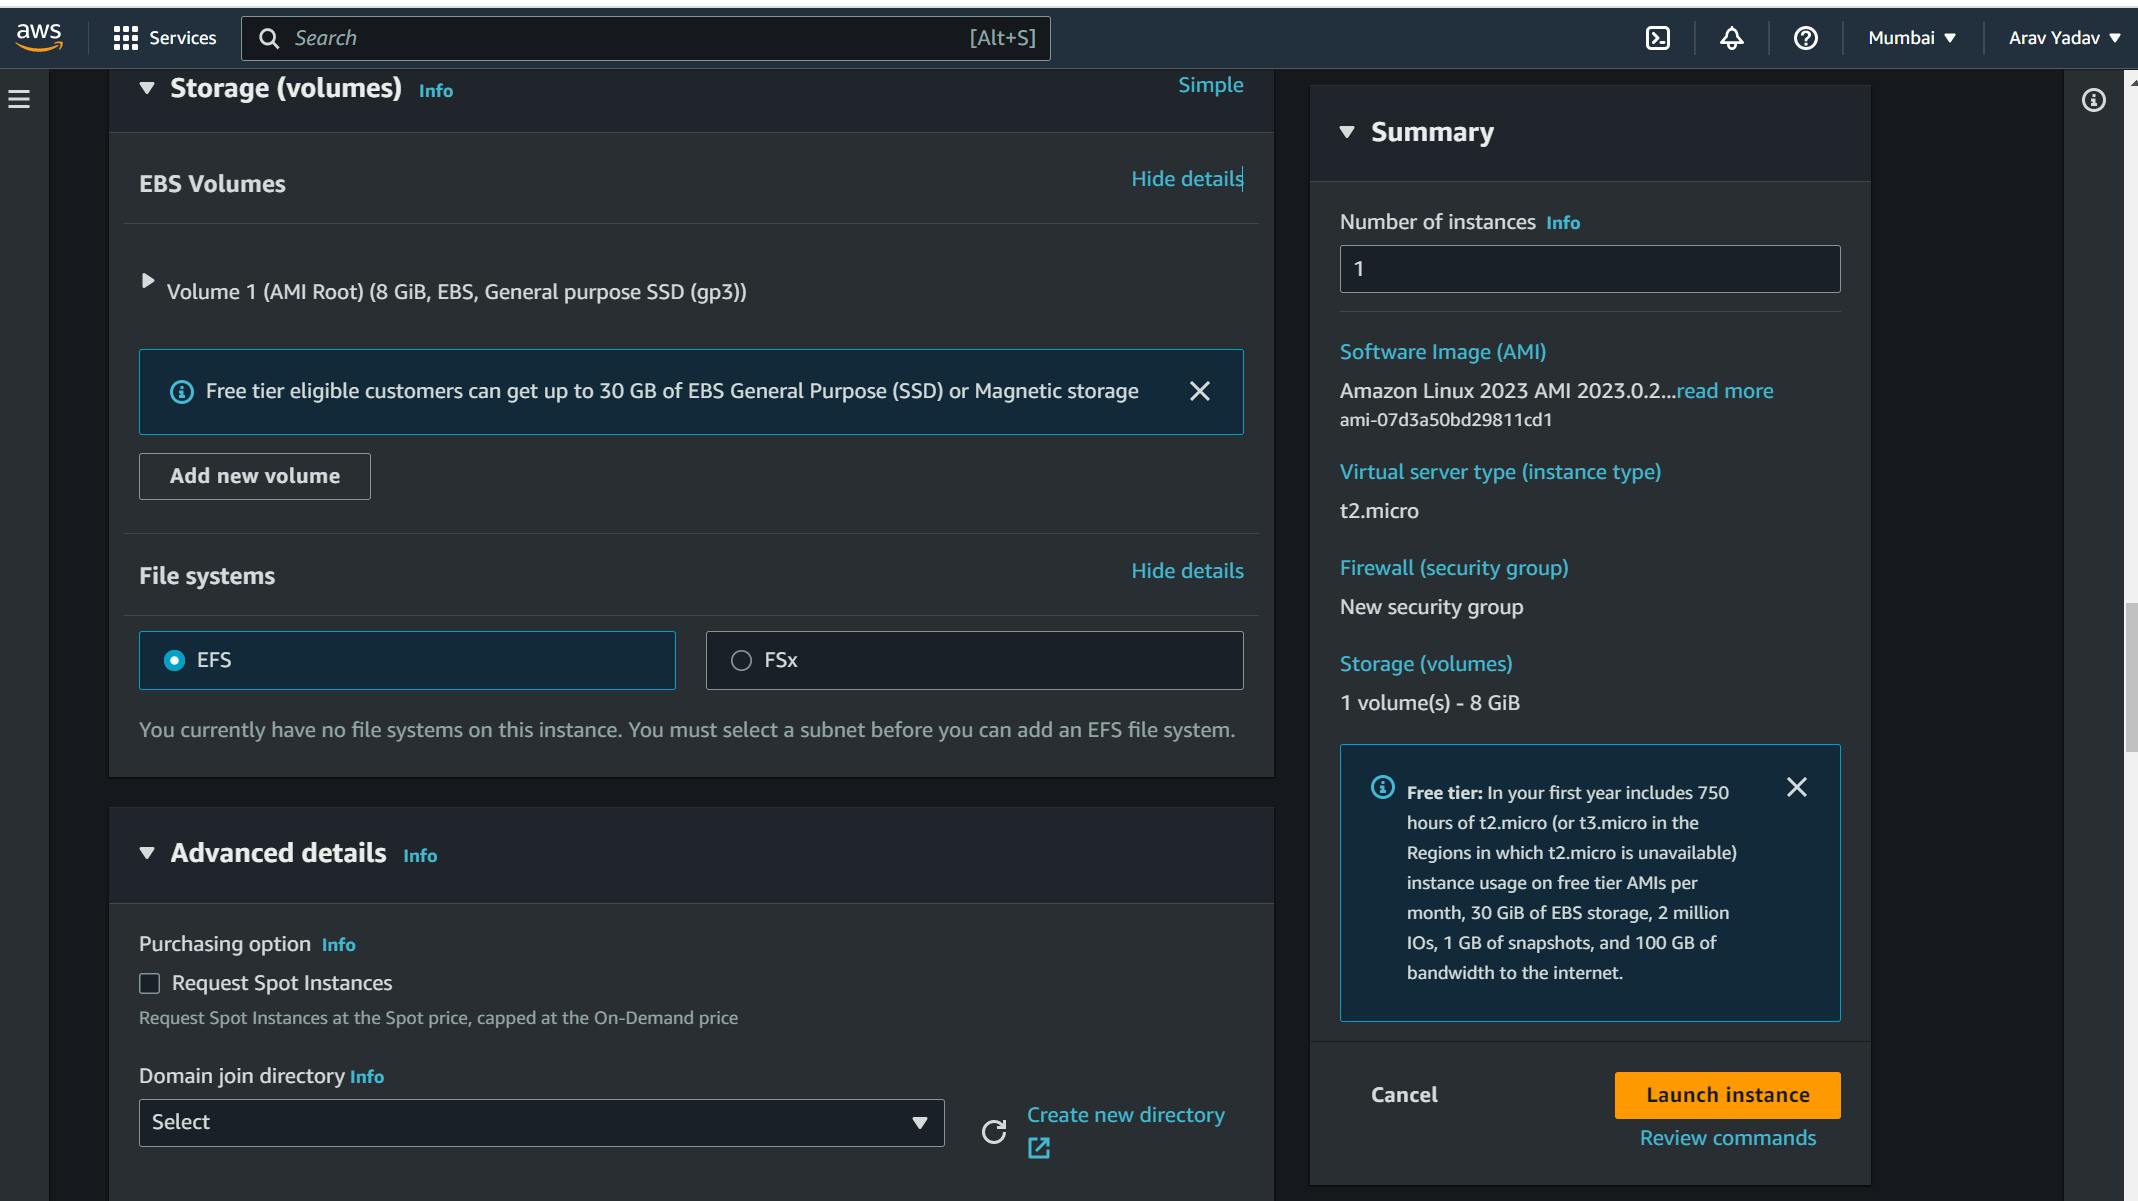
Step 6: Configure Storage Setting

Step 7 : settings -> Click on Launch Instances
Add Storage Choose the amount of storage that you want to allocate to your server. You can also add additional storage volumes if needed. Once you have made your selections, click " On launch InstanceNext
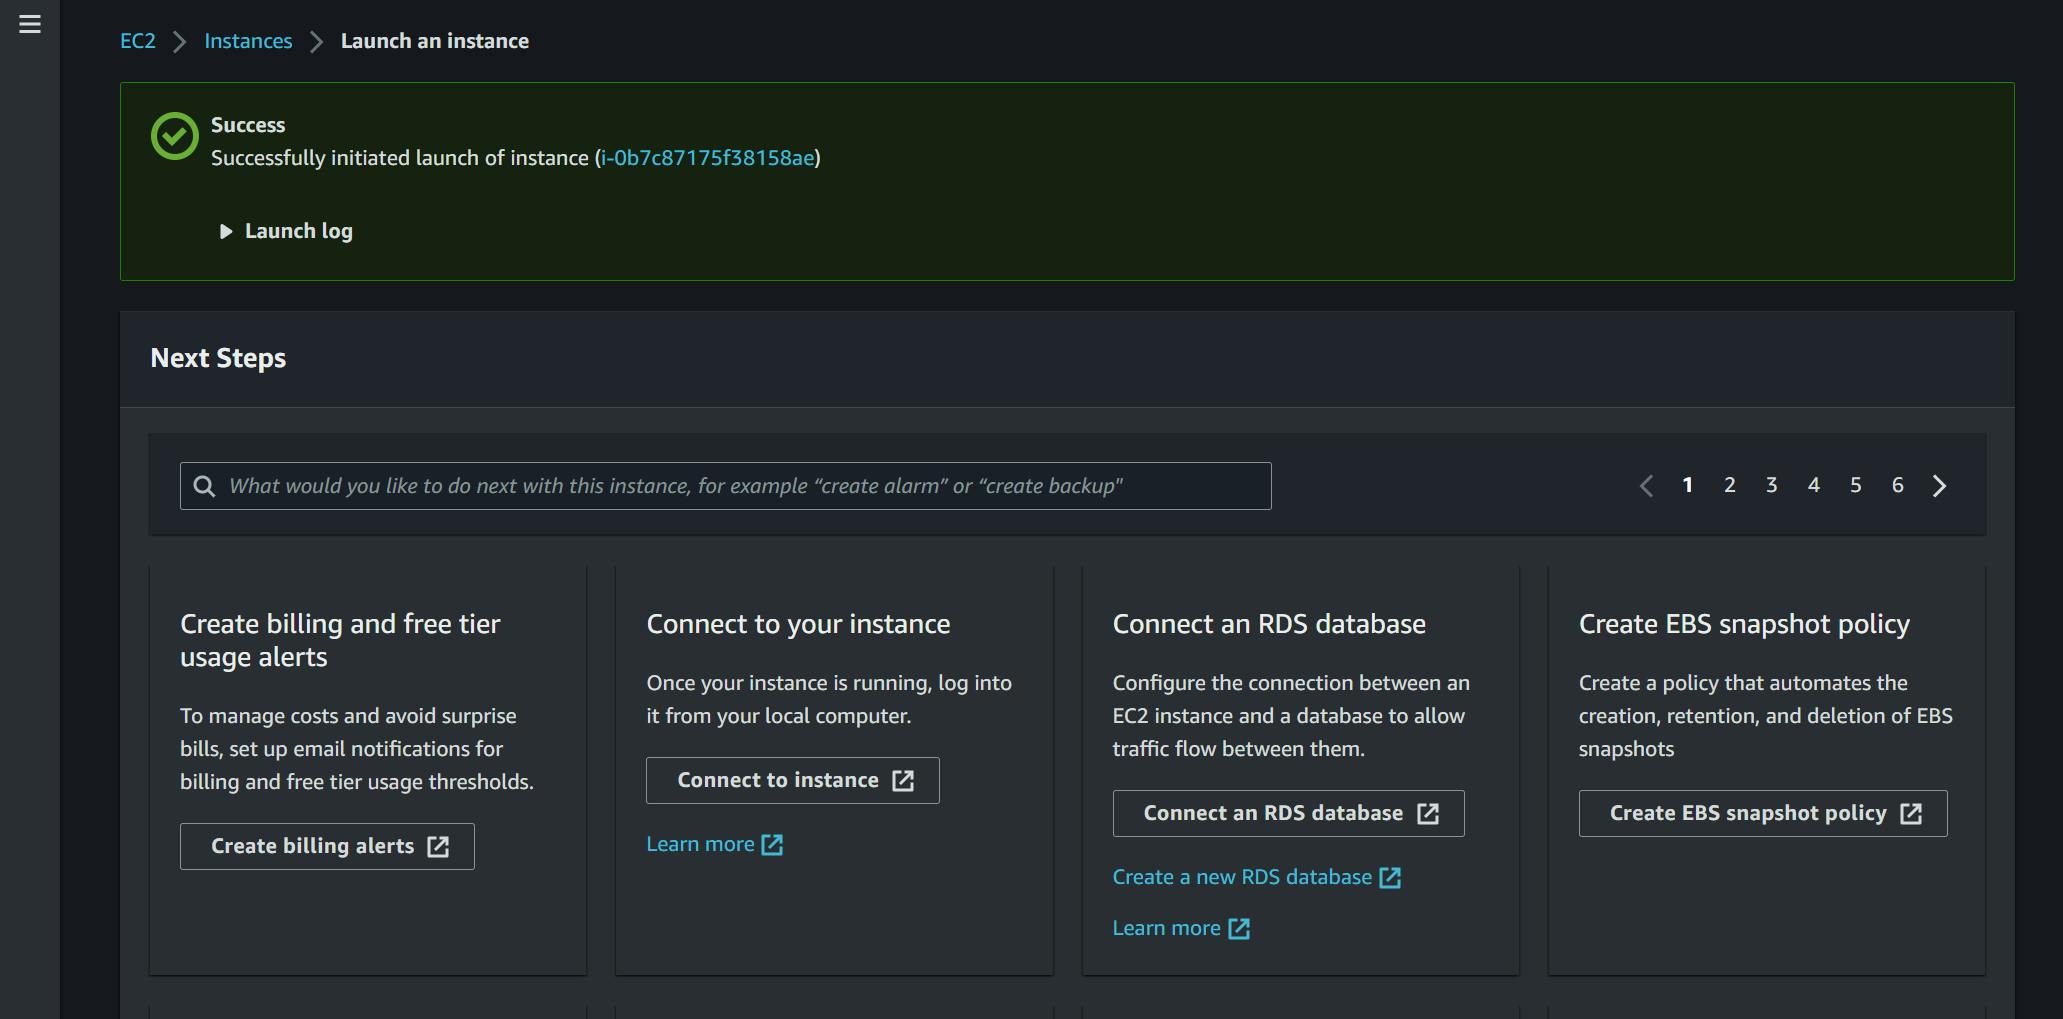
Step 7 : Click to connect To the Instance
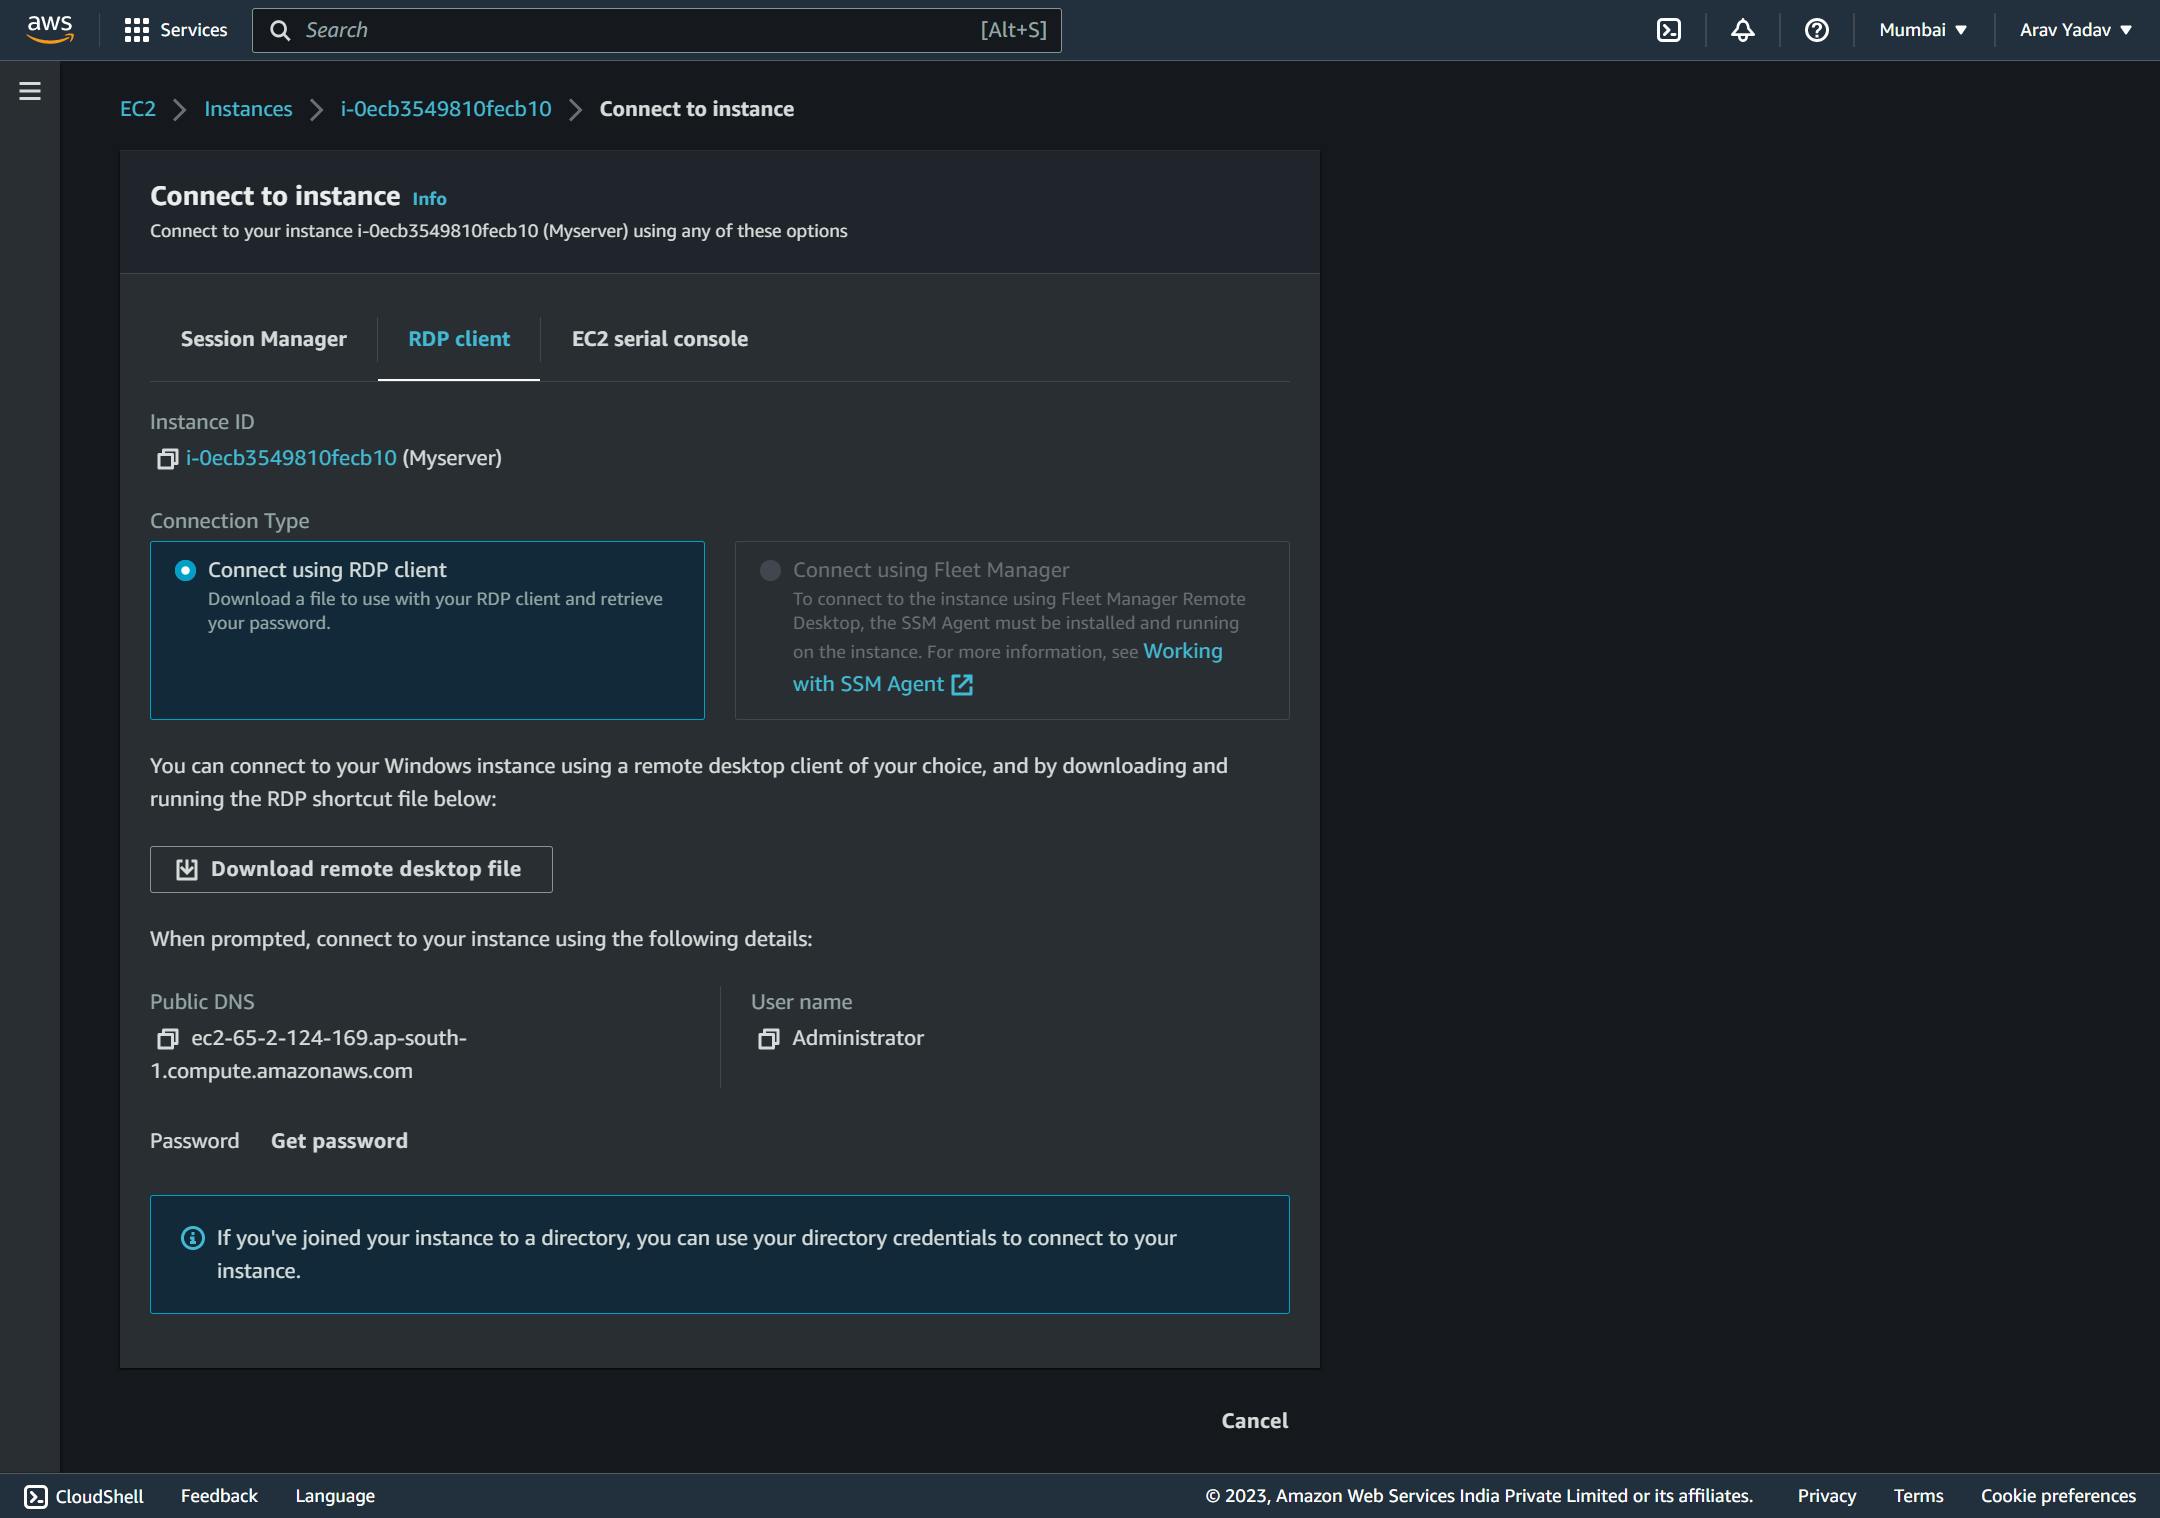
Step 9: Click on RDP client --->select " connect using RDP client " -->Download "Remote Desktop File"
Choose "RDP client" as the connection method, and then click "Download Remote Desktop File".
Step 10: Upload the key-pair file and decrypt the password
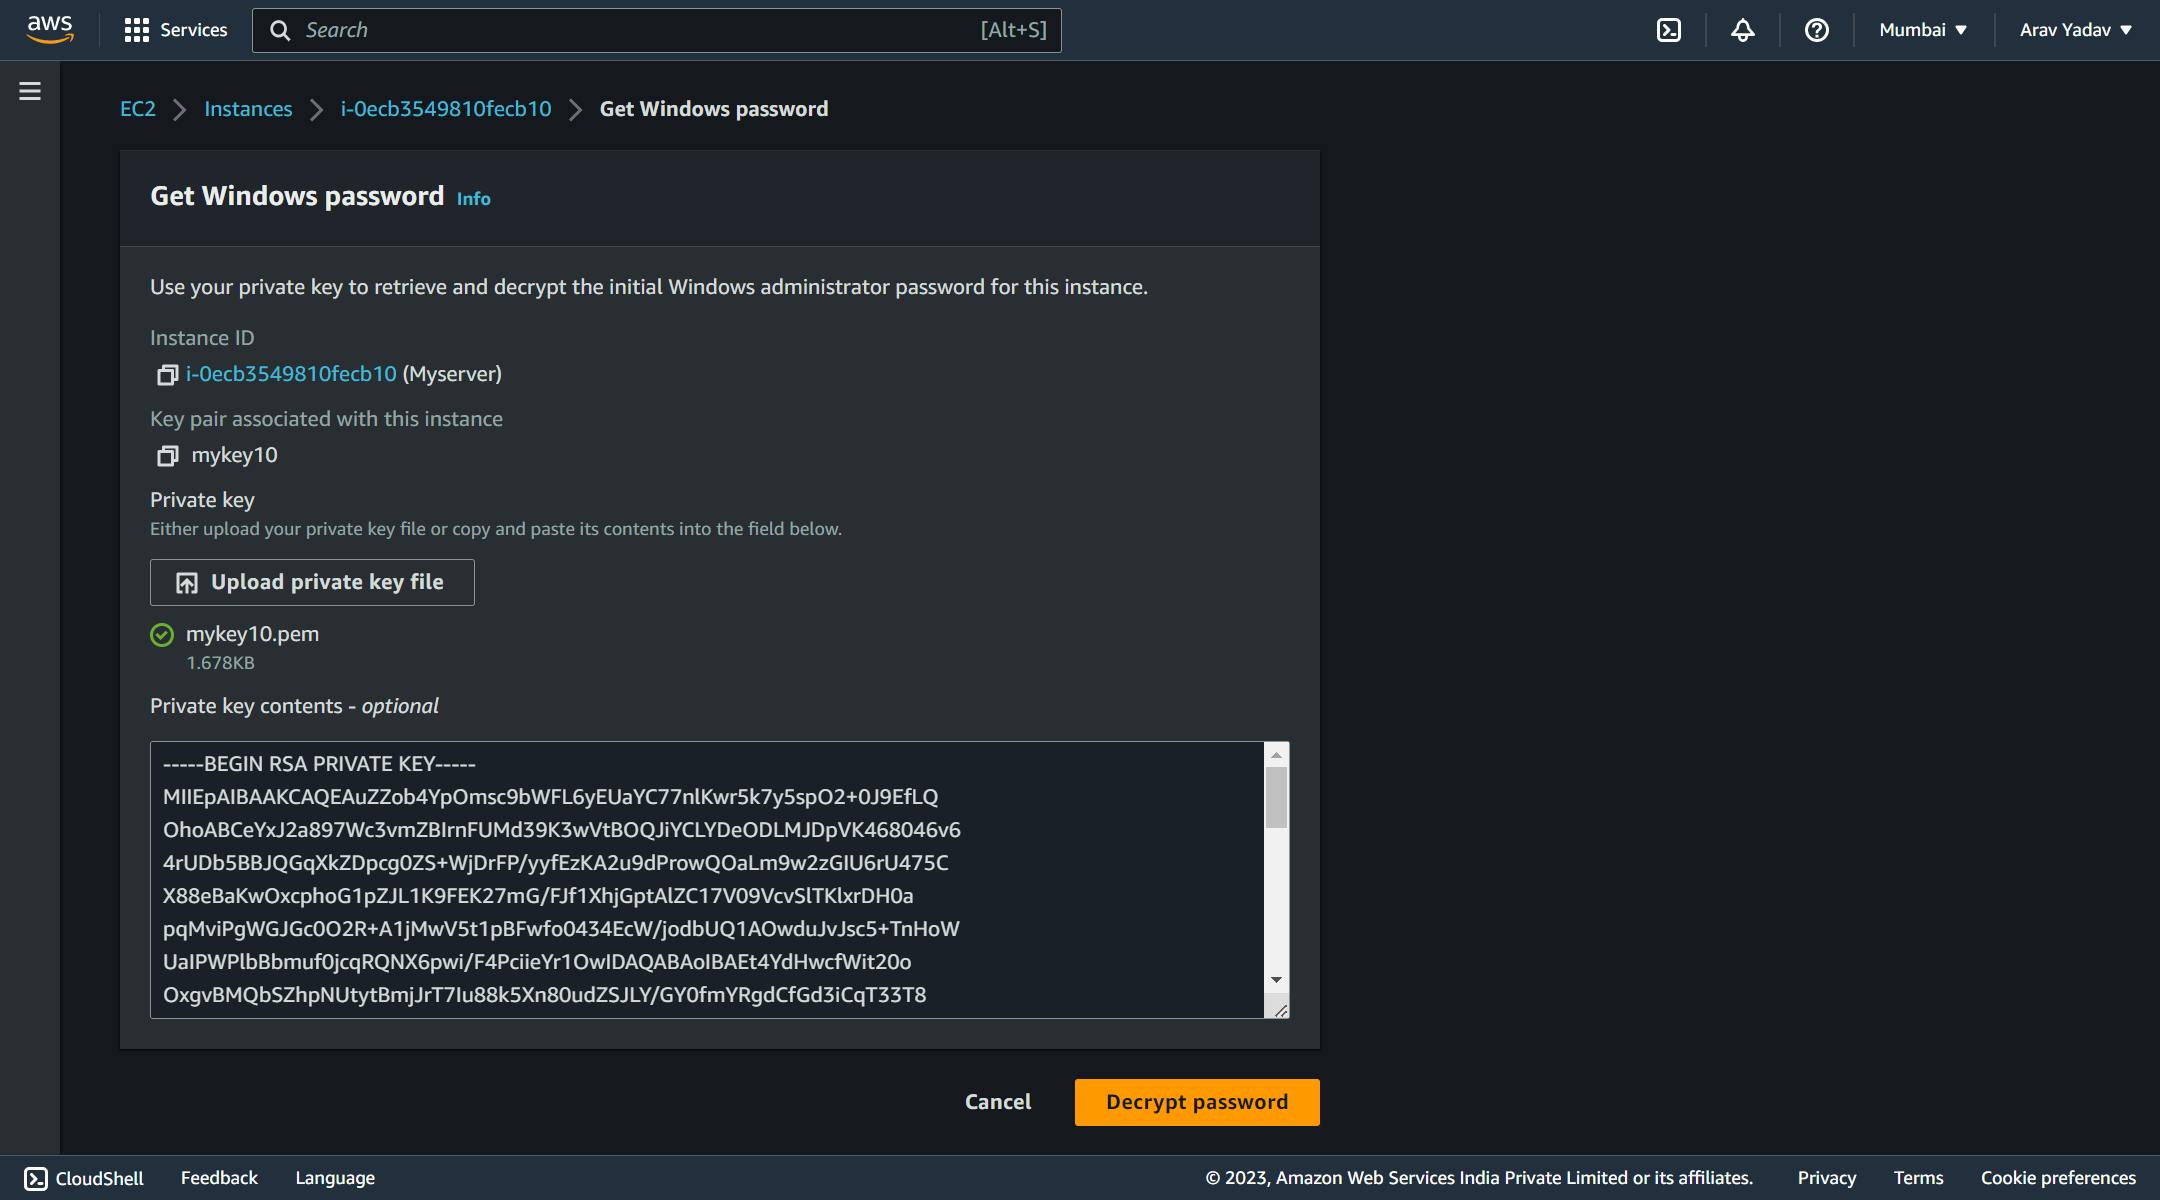
Step 11: Copy that decrypted password

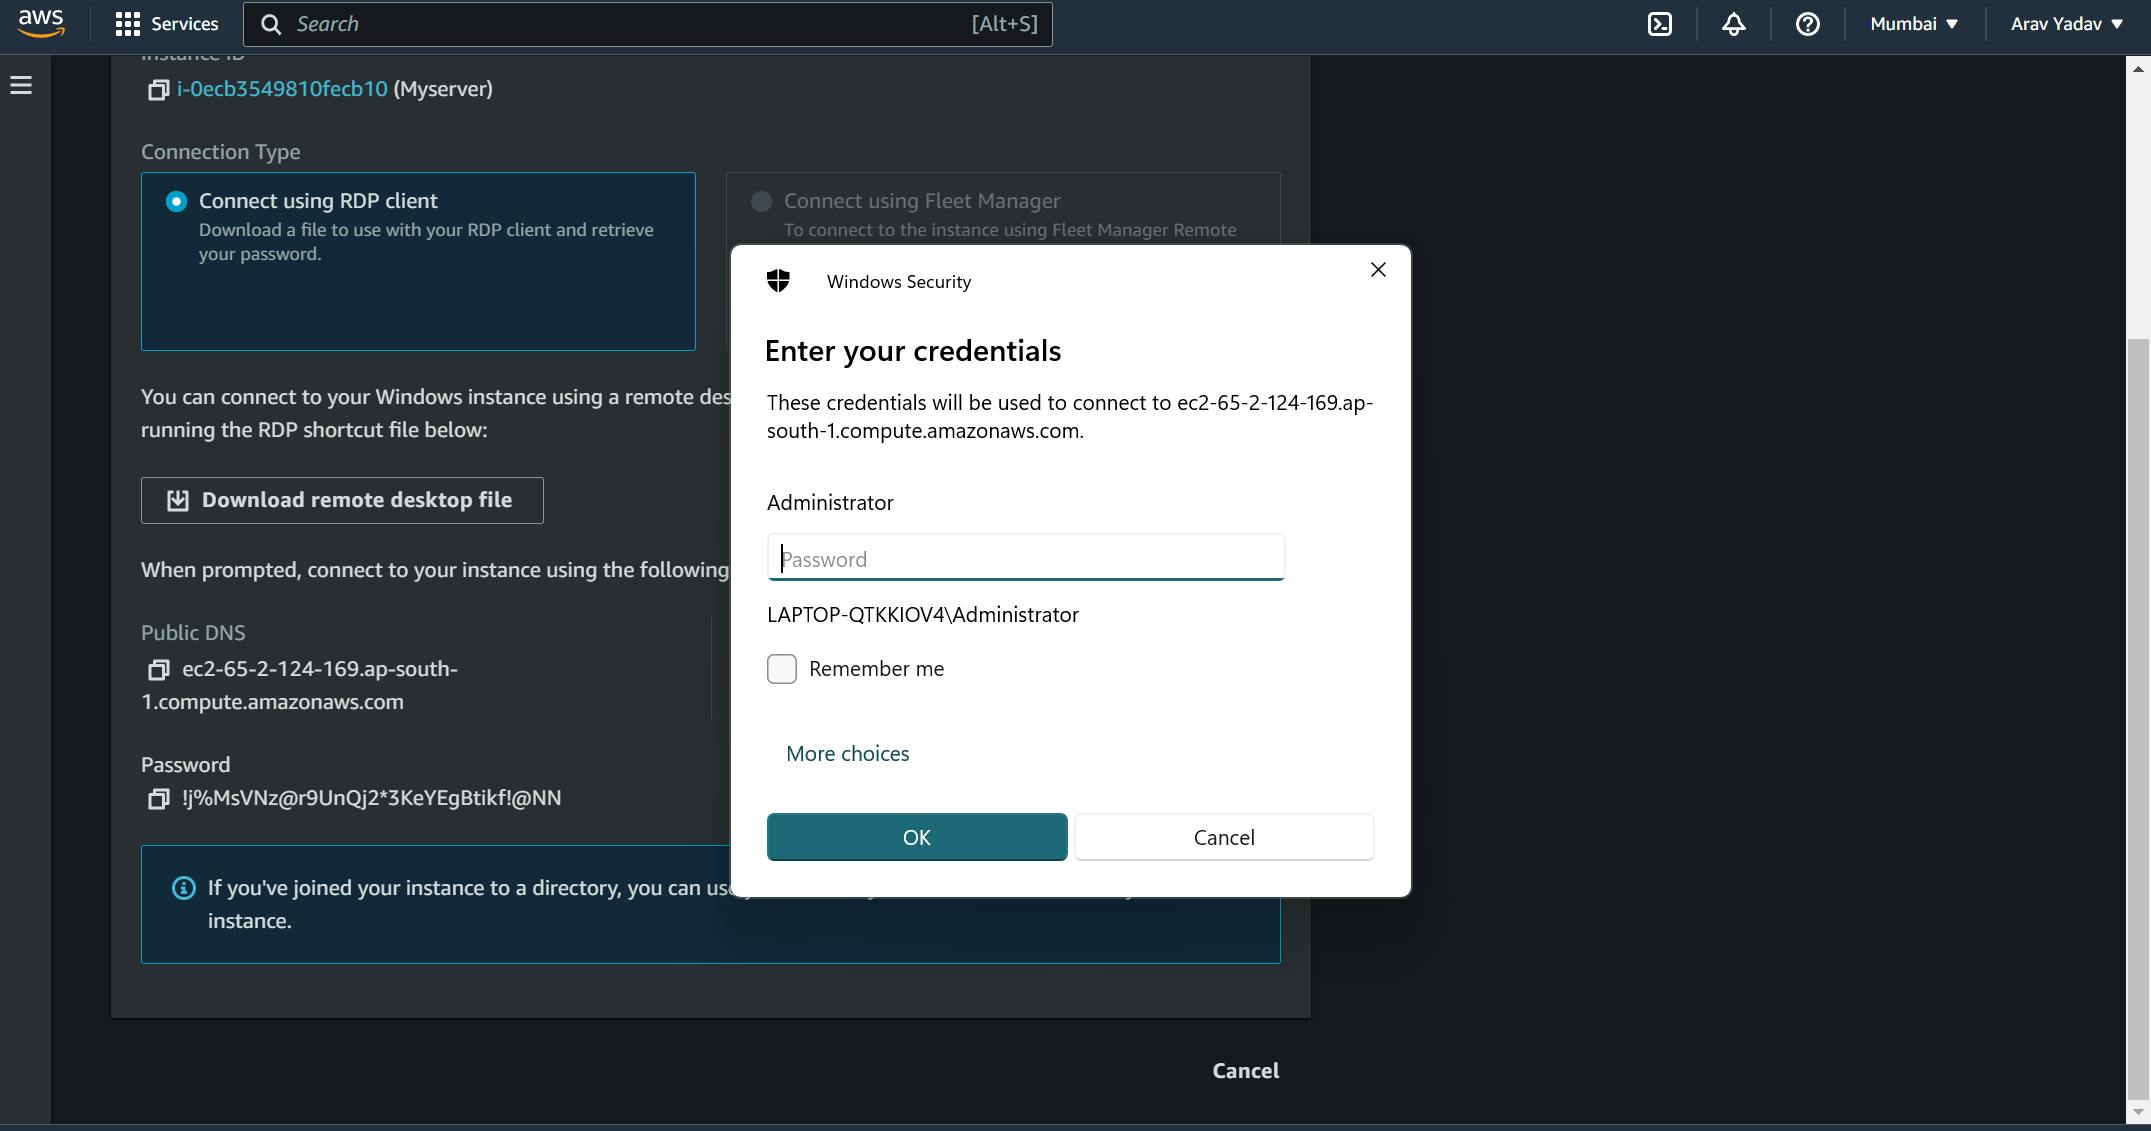
Step 13: Connect .rdp file --> Paste that password to open the .rdp file
Open the RDP file, and when prompted, enter the credentials for the Windows Server instance.
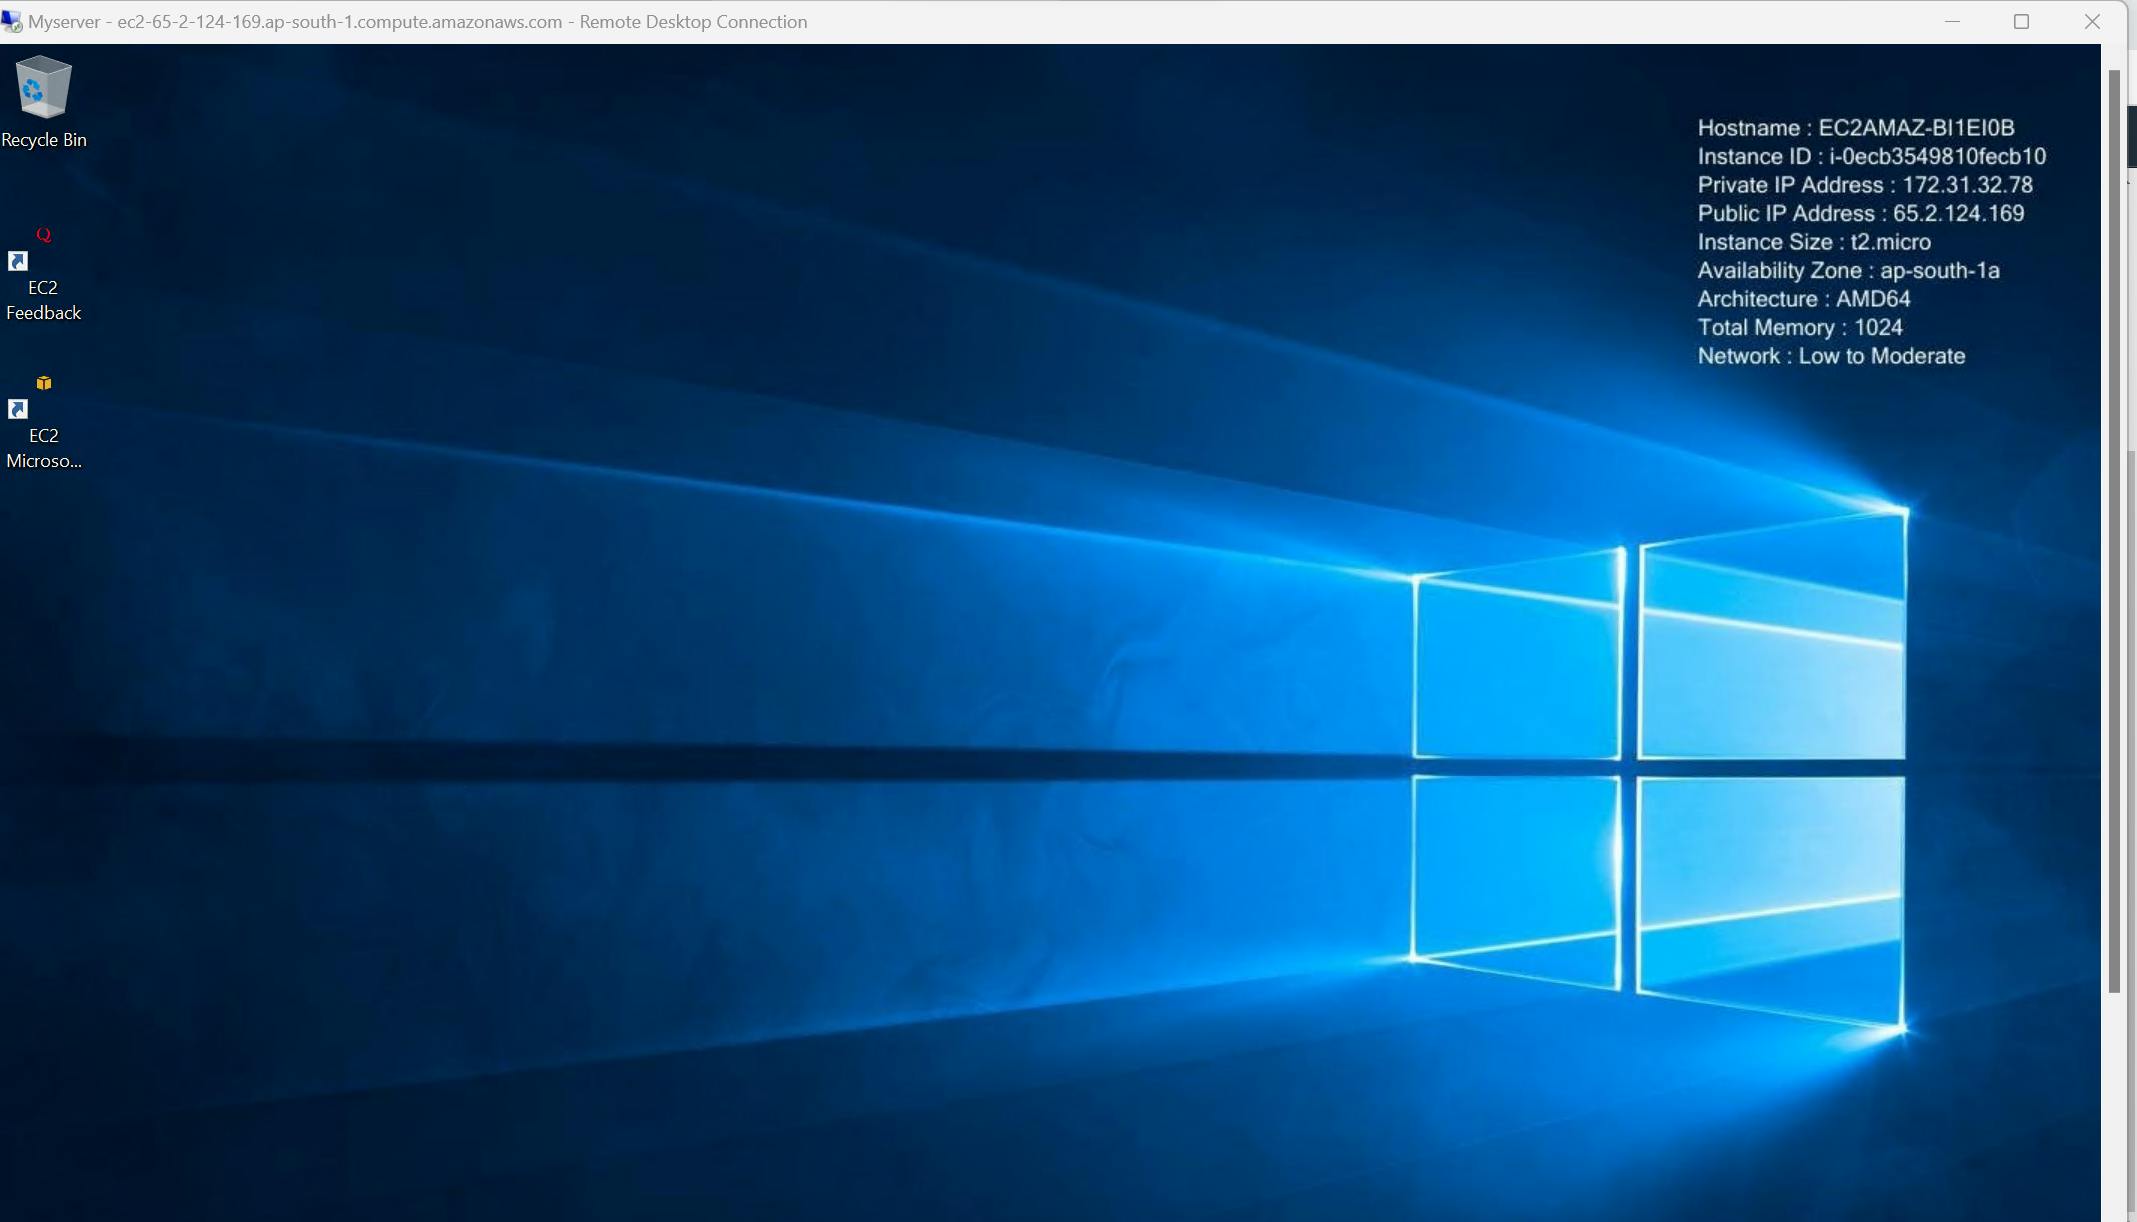
Step 14: "Now we can see the new window of launched instance"
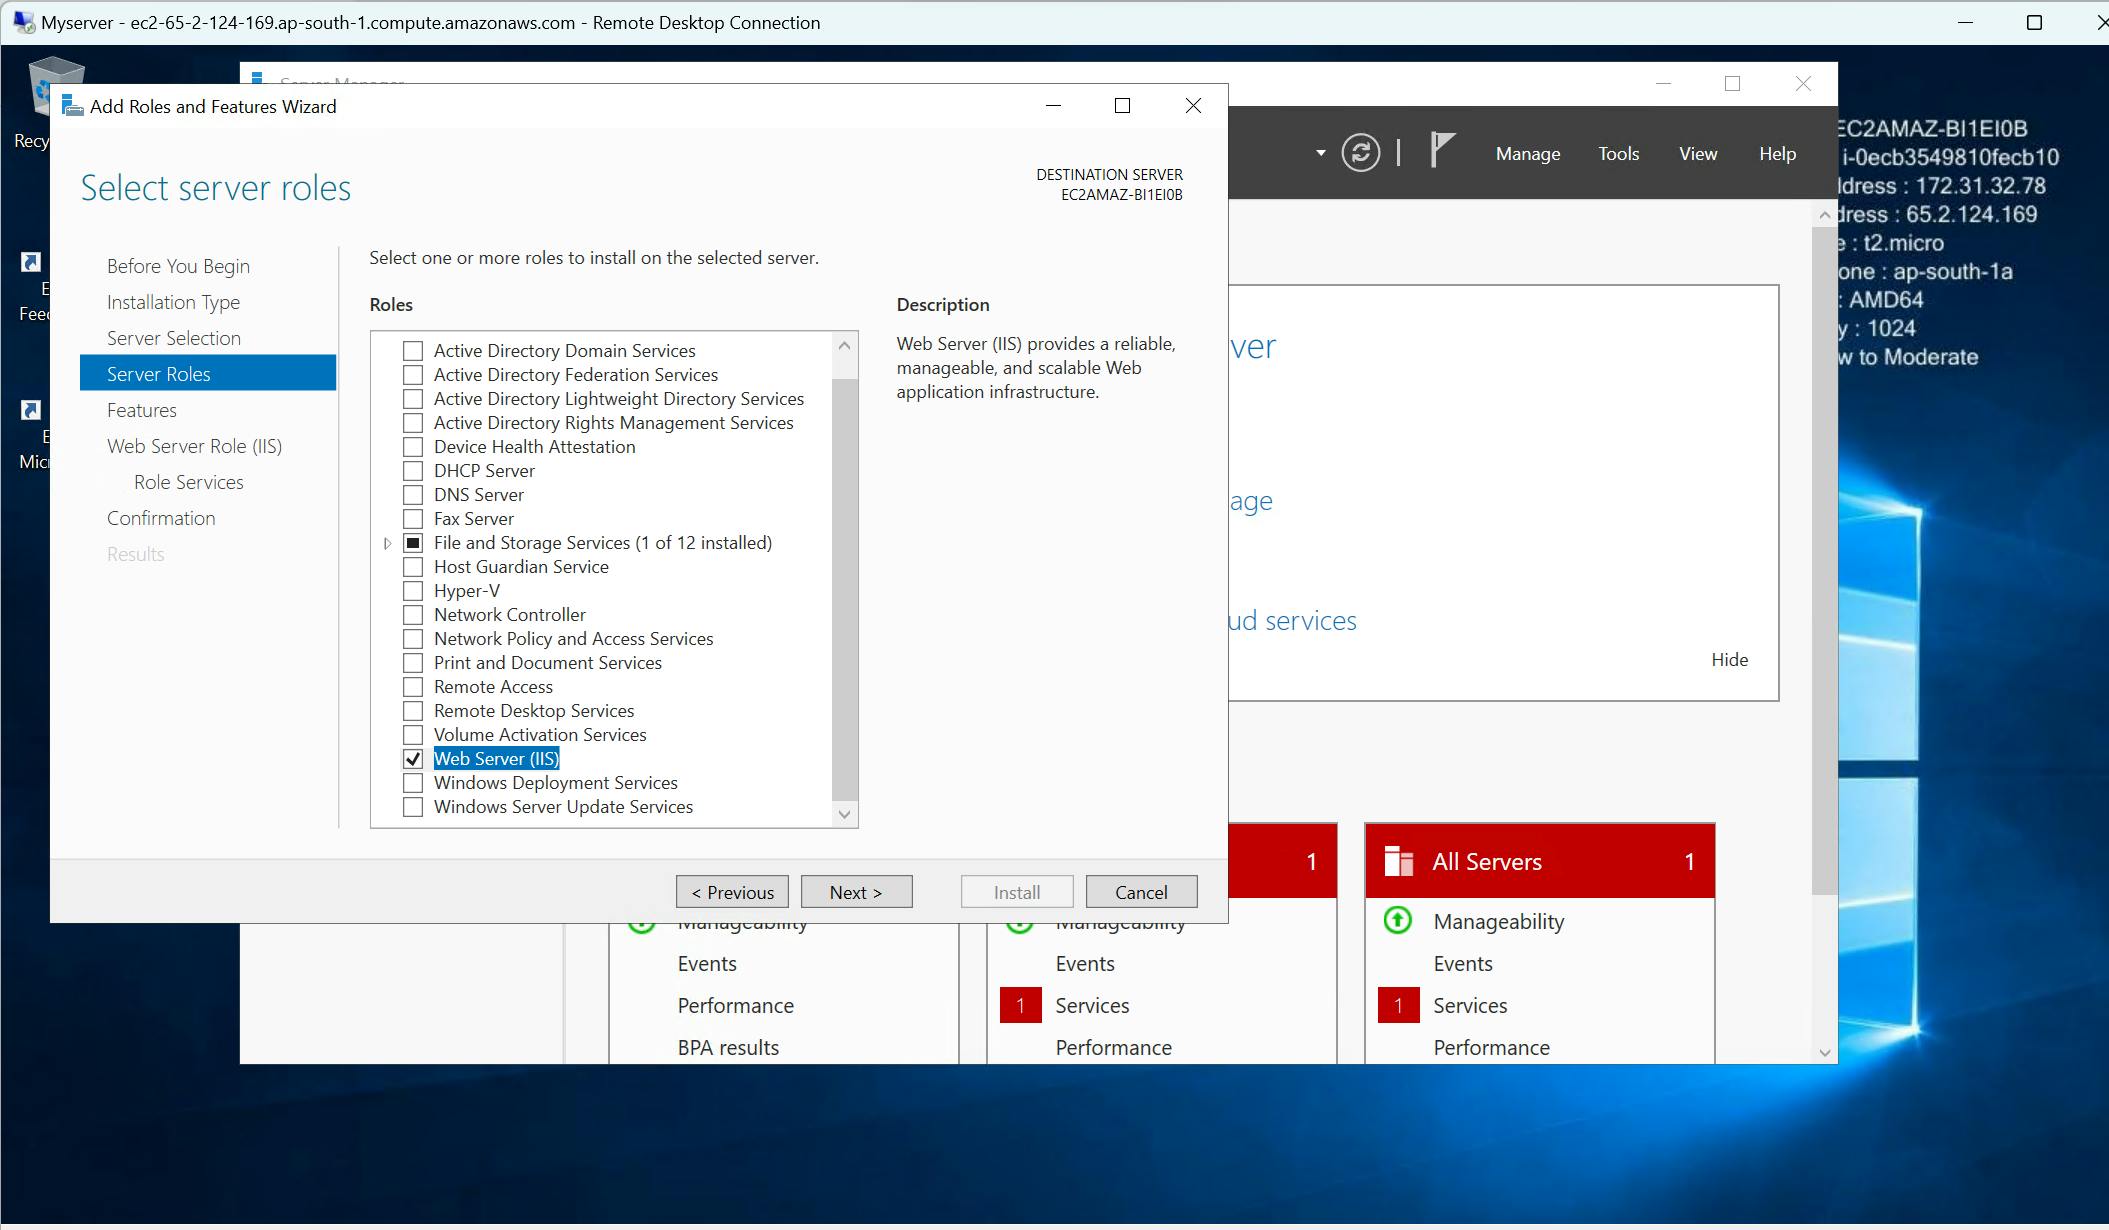
Step 15: Go to server Manger --> click on "add role and feature"
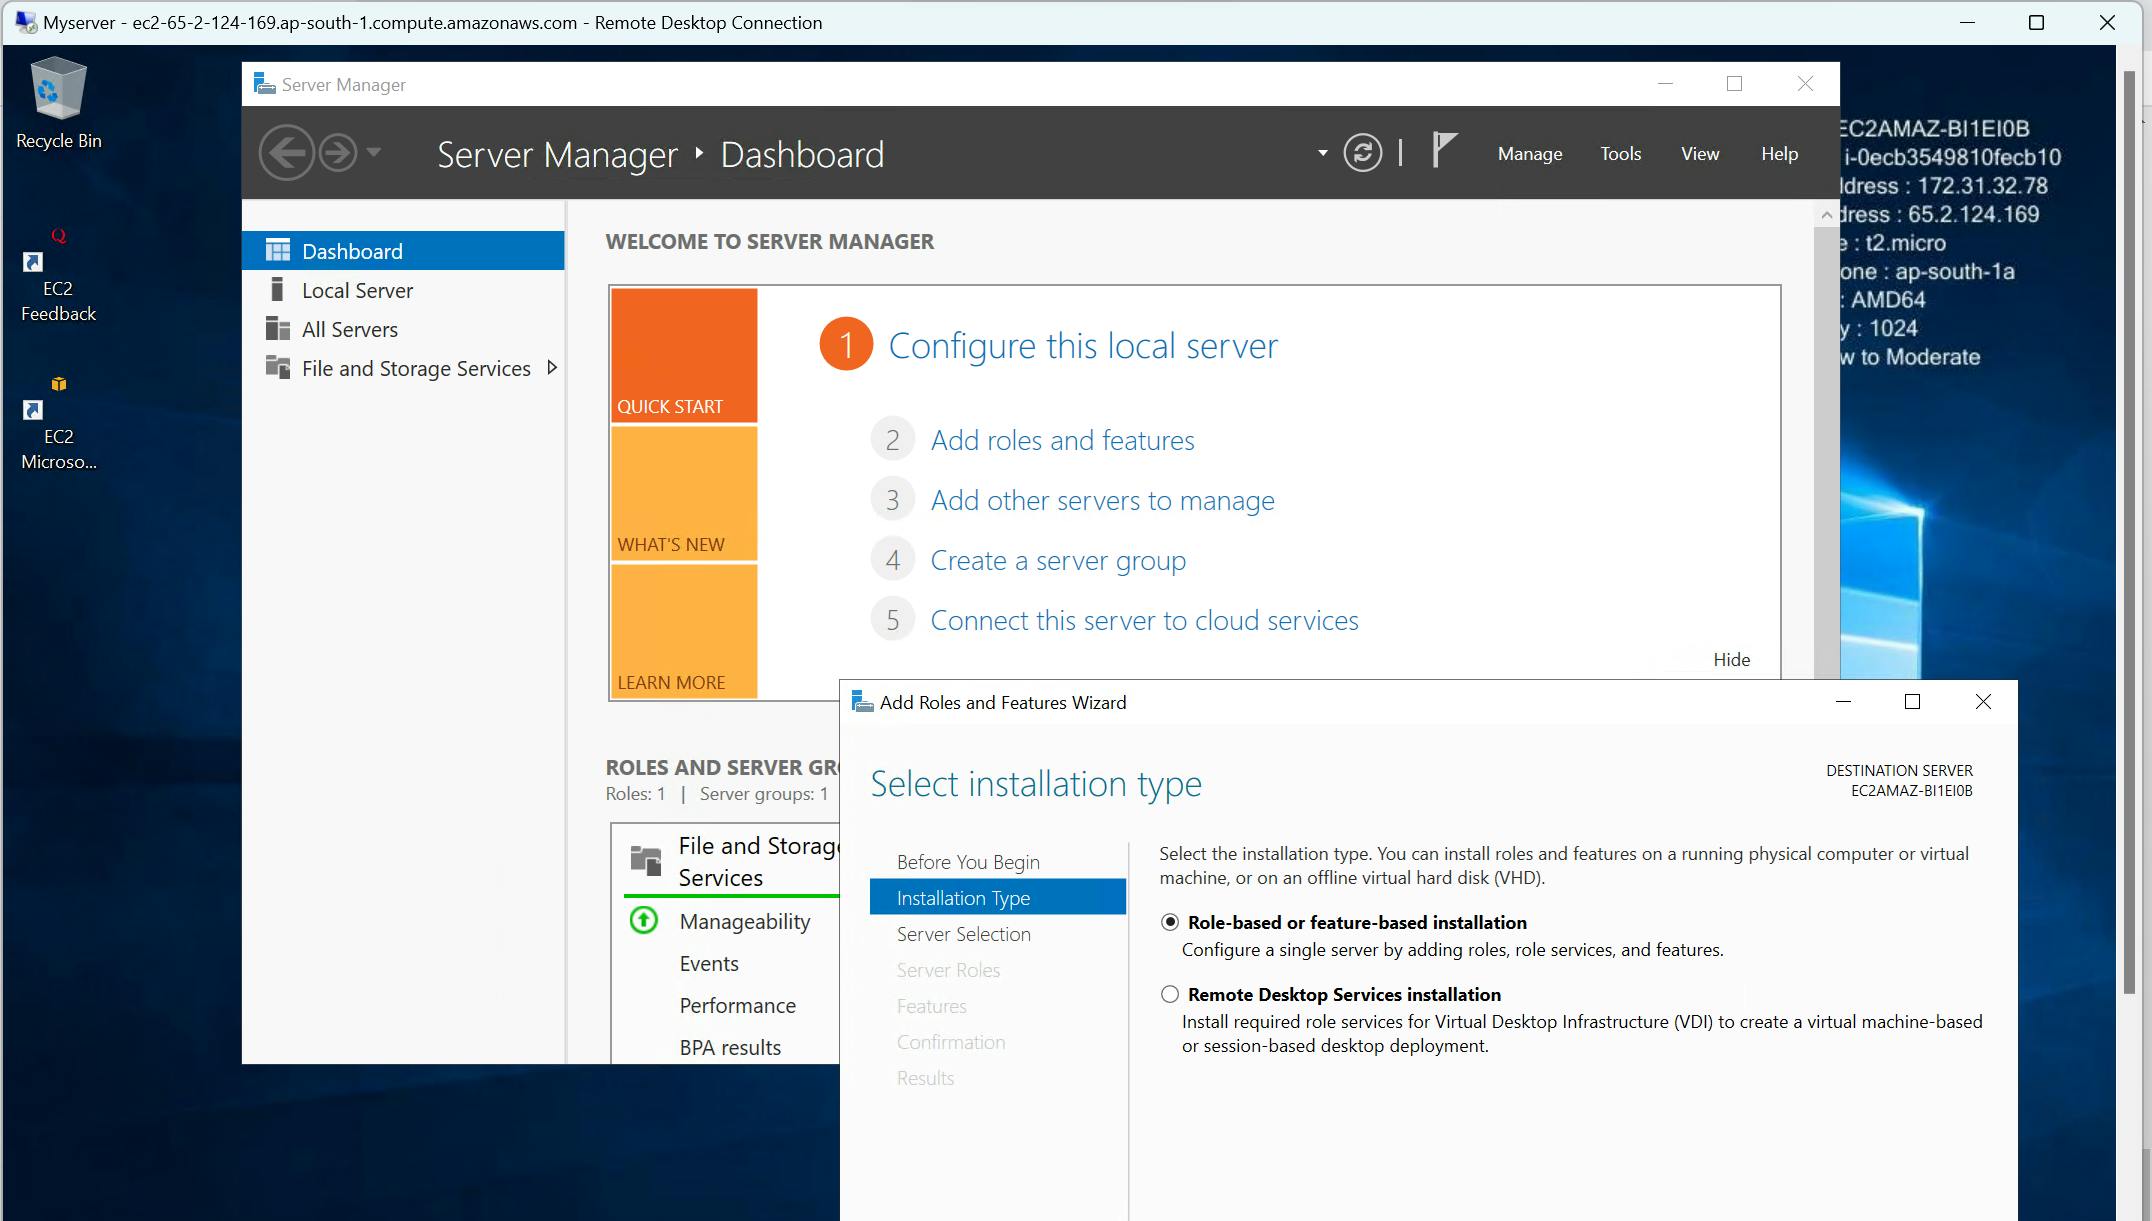
Step 16 : Select -> select web server(IIS) --> click on next
Step 17: After completing Installation: Go to This PC -> C Drive _> inetpub -> www root and delete those files and create a new text file.
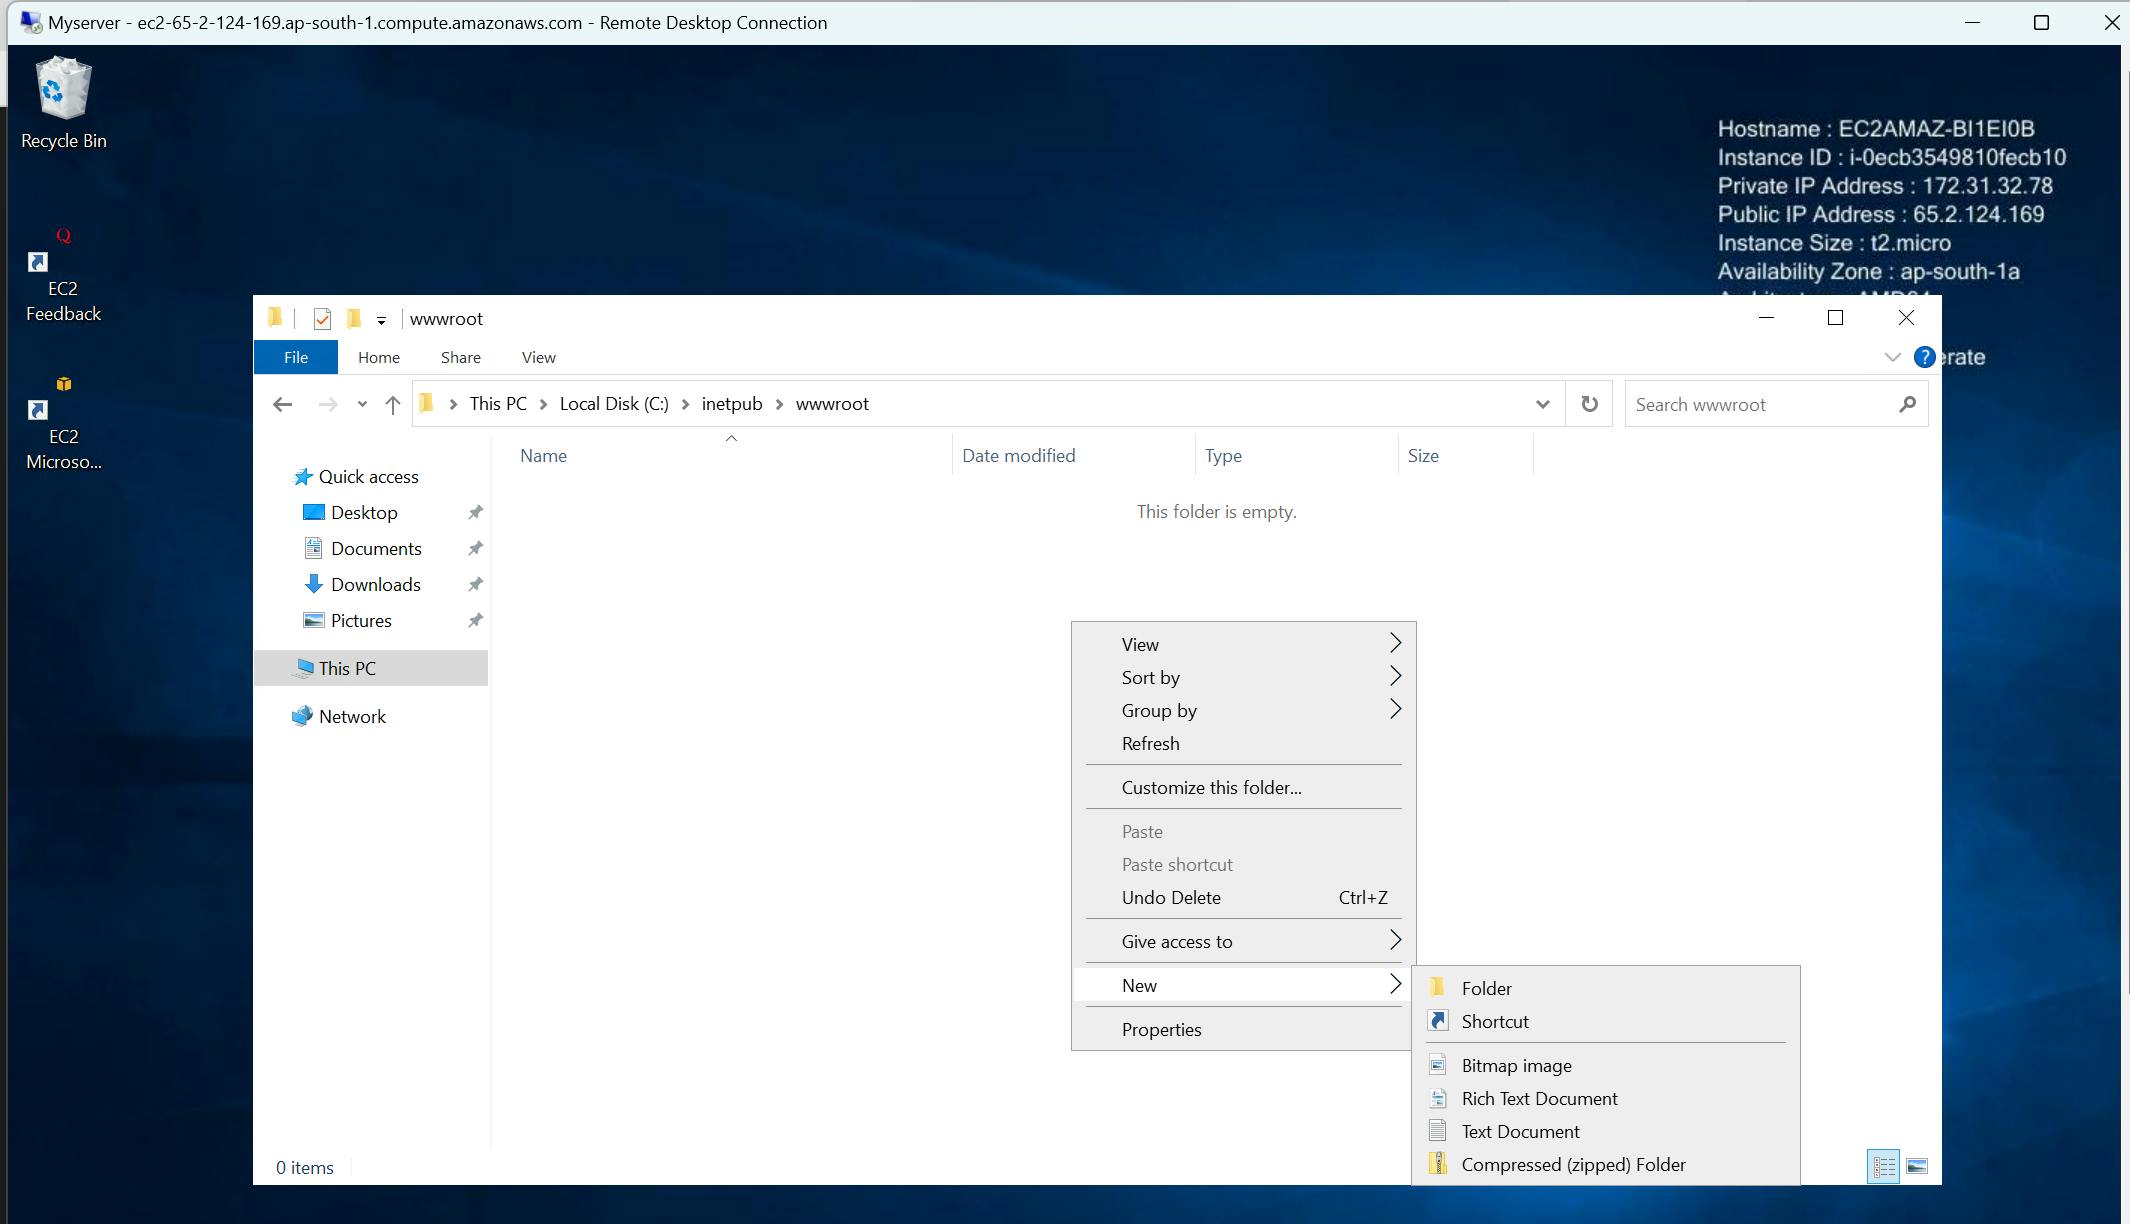
Step 18: Write HTML Code in that text file and save it as ‘index.html’.
<!DOCTYPE html>
<html>
<head>
    <title>Login Page</title>
    <style>
        body {
            background-color: #f2f2f2;
            font-family: Arial, sans-serif;
        }
        form {
            background-color: #fff;
            padding: 20px;
            border-radius: 10px;
            box-shadow: 0px 0px 10px rgba(0,0,0,0.3);
            width: 300px;
            margin: 50px auto;
        }
        h2 {
            text-align: center;
            margin-bottom: 20px;
        }
        input[type="text"],
        input[type="password"] {
            width: 100%;
            padding: 10px;
            margin-bottom: 20px;
            border-radius: 5px;
            border: none;
            background-color: #f2f2f2;
        }
        input[type="submit"] {
            background-color: #4CAF50;
            color: #fff;
            padding: 10px 20px;
            border: none;
            border-radius: 5px;
            cursor: pointer;
        }
        input[type="submit"]:hover {
            background-color: #3e8e41;
        }
    </style>
</head>
<body>
    <form>
        <h2>Login</h2>
        <label for="username">Username:</label>
        <input type="text" id="username" name="username">
        <label for="password">Password:</label>
        <input type="password" id="password" name="password">
        <input type="submit" value="Submit">
    </form>
</body>
</html>
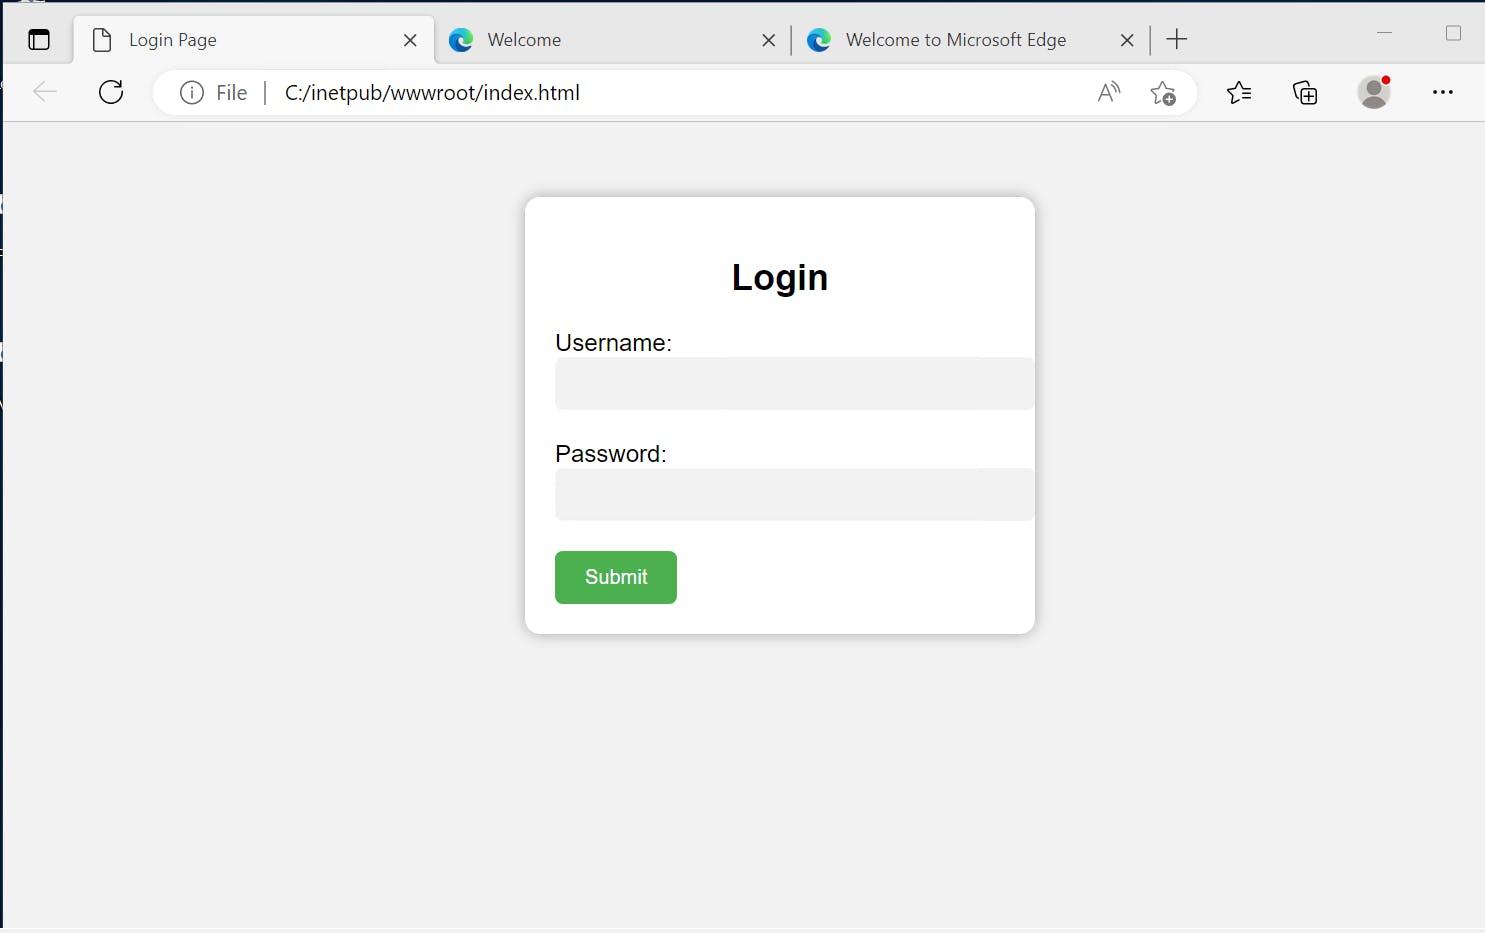
Step 19: Open that index.html file with help of a browser.
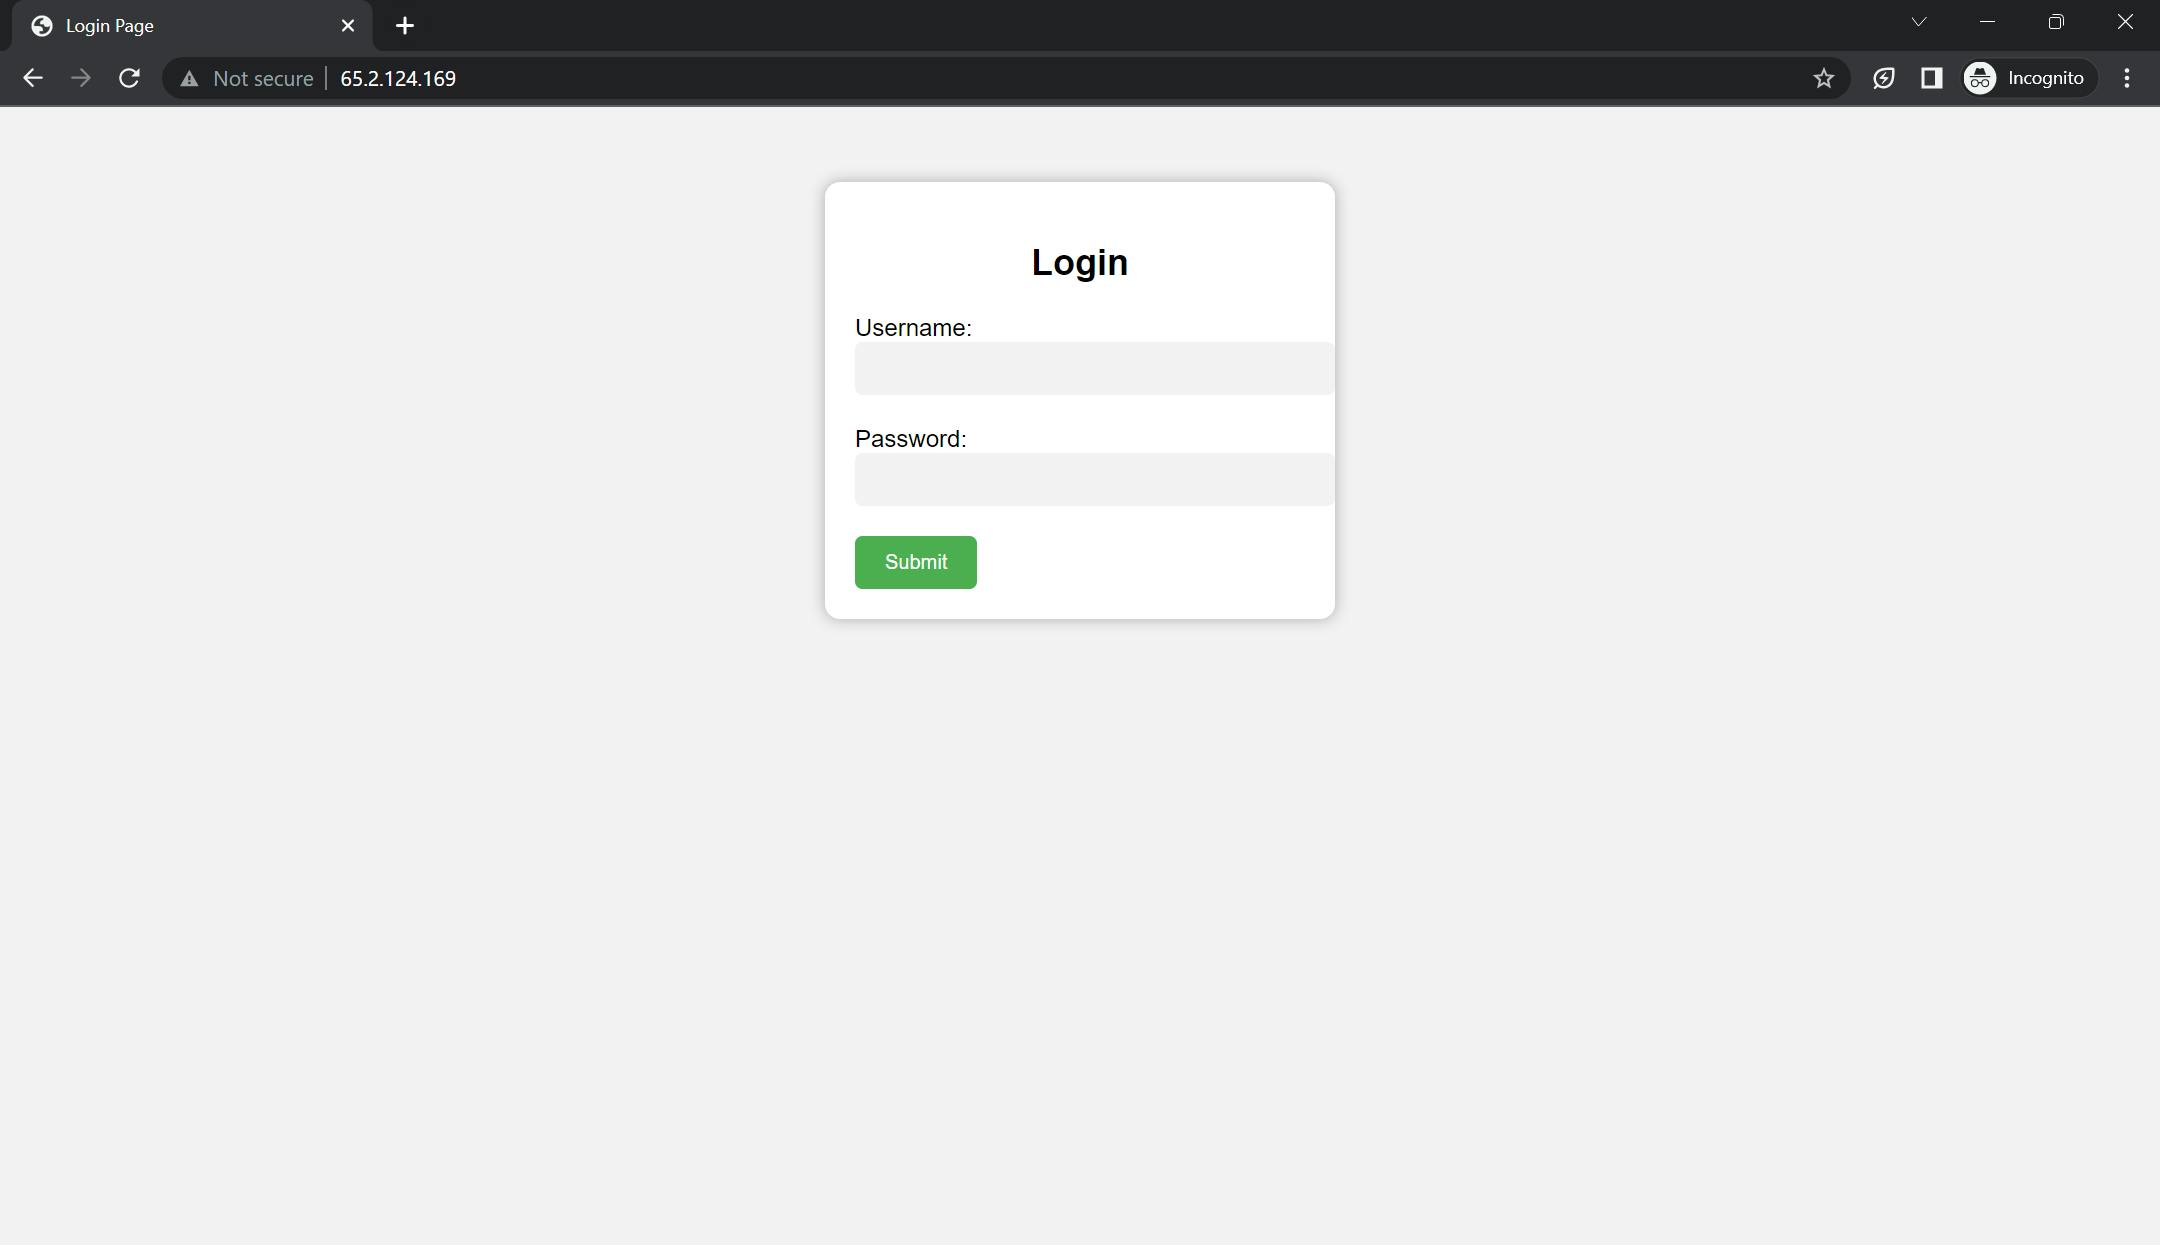
Step 24: Test your website by navigating to the public IP address of your instance in a web browser.
Now Copy the public IP address and Open the browser in the host machine -and paste that public IP and you can see the same Web page can be accessed by your host machine
Now you can click on Instance state and then Terminate instance. That's it! You should now have a fully functioning Windows Server on AWS with IIS installed and your website hosted. If you have any questions or run into any issues, feel free to reach out and I'll do my best to help