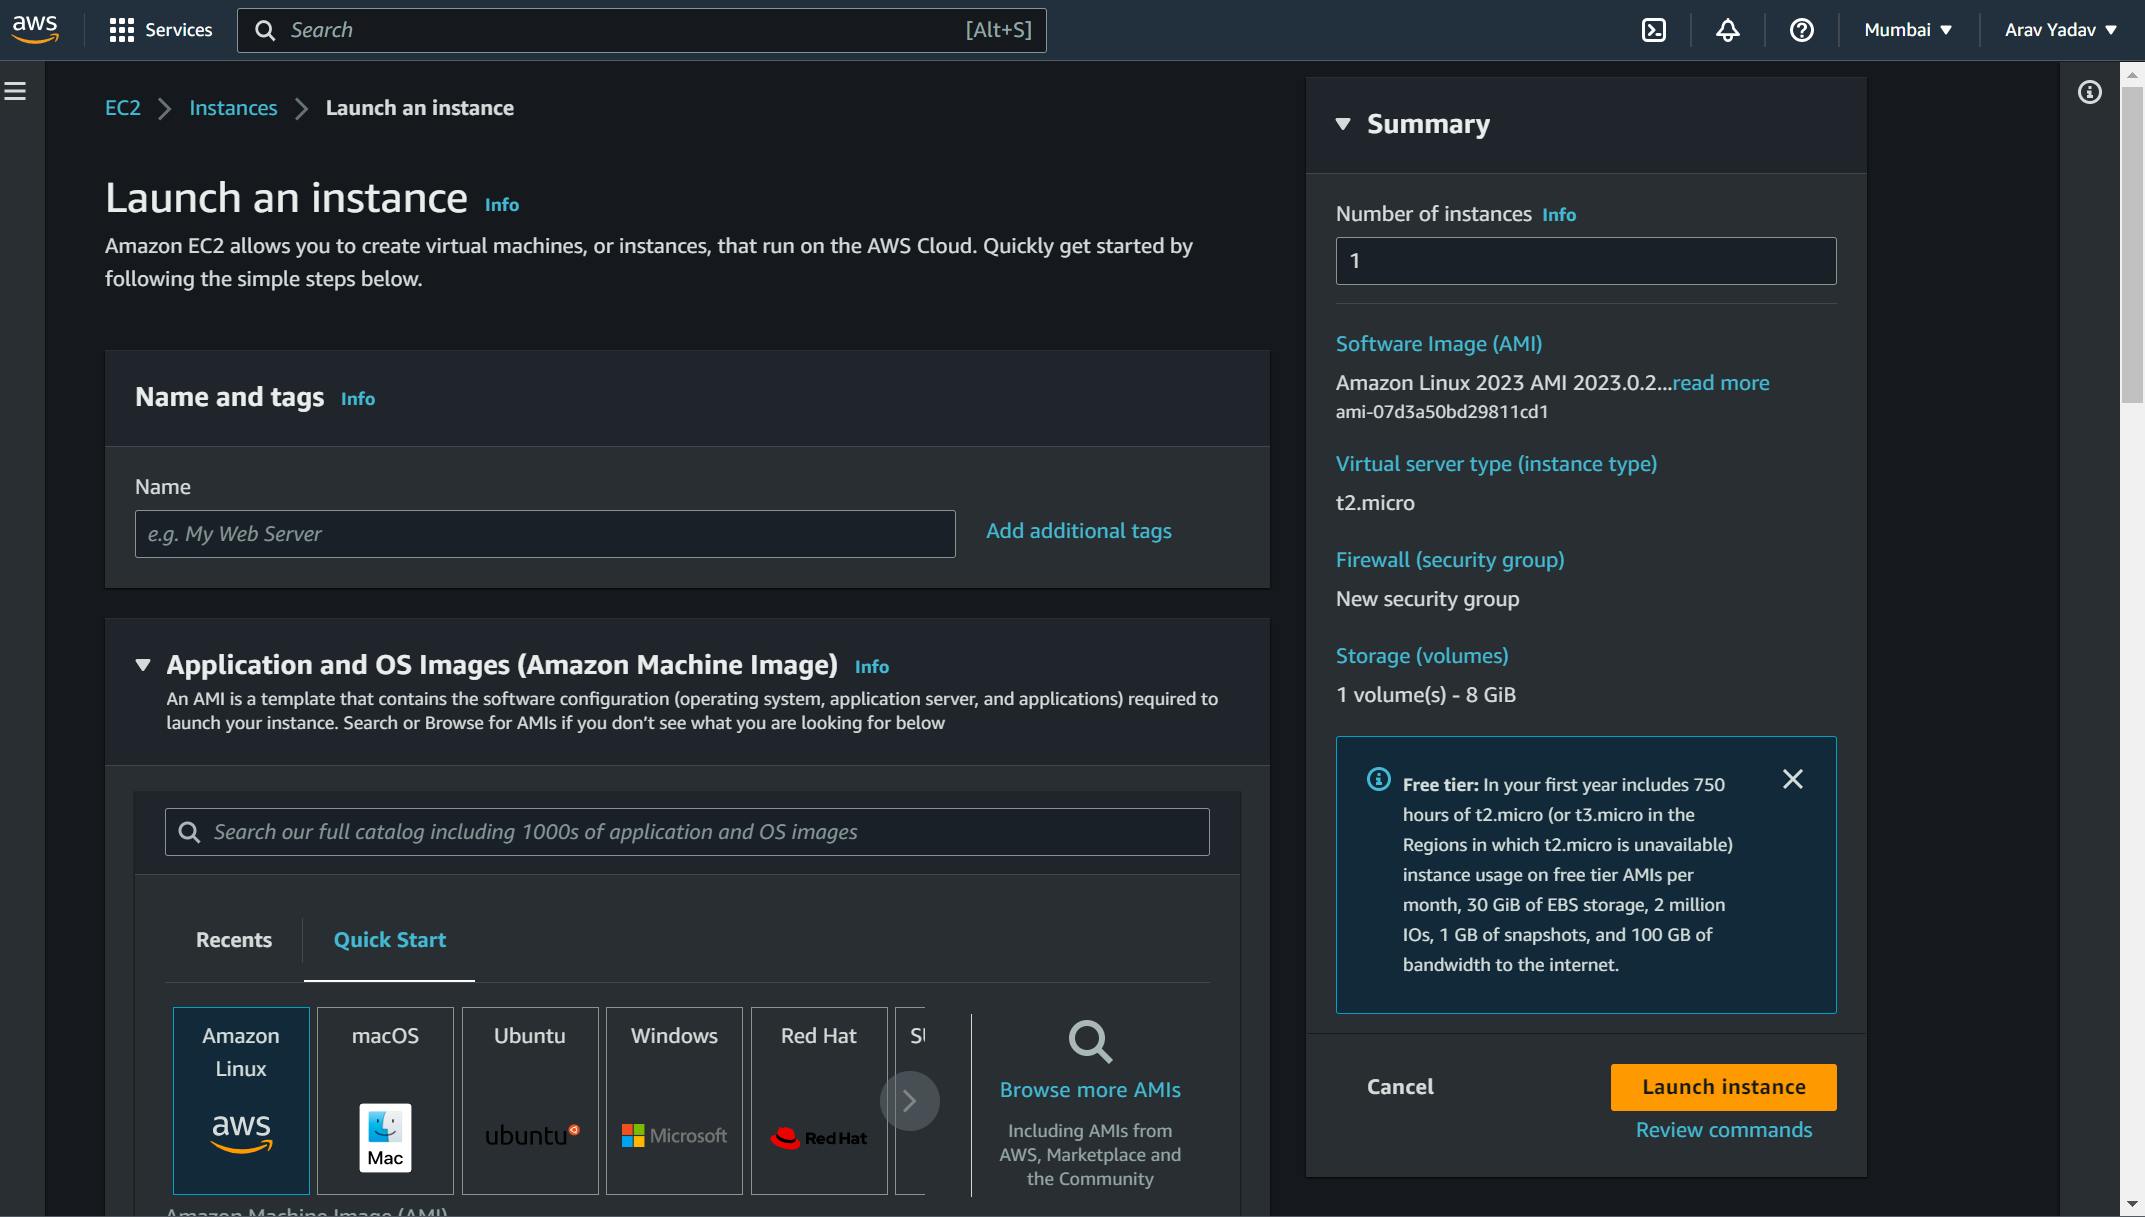
Step 1: Create a New Instance
Create a New Instance Choose the Amazon Machine Image (AMI) that you want to use. In this case, select a Ubuntu AMI or an Amazon Linux AMI

Step 2:Connect to the instance
To connect to the Linux instance using SSH open the Windows PowerShell or Command prompt or the applications that support SSH.

Step 2: Create an Access Key from the ‘Security Credential Tab’


When you run aws configure, you'll be prompted to enter your AWS access key ID, secret access key, default region, and default output format. The access key ID and secret access key are used to authenticate your requests to AWS, while the default region and output format determine where AWS resources are created
Step 3: Install AWS CLI
sudo apt install awscli
Step 4: Run the following command to launch an EC2 instance:
aws ec2 run-instances --image-id <AMI_ID> --count 1 --instance-type <INSTANCE_TYPE> --key-name <KEY_PAIR_NAME> --subnet-id <SUBNET_ID>
Replace <AMI_ID> with the ID of the Amazon Machine Image (AMI) you want to use, <INSTANCE_TYPE> with the desired EC2 instance type (e.g., t2.micro), <KEY_PAIR_NAME> with the name of an existing key pair, and <SUBNET_ID> with the ID of the subnet within the default VPC where you want to launch the instance
Step 5:Run the following command to create an S3 bucket:
aws s3api create-bucket --bucket my-bucket --region us-east-1
Replace <AMI_ID> with the ID of the Amazon Machine Image (AMI) you want to use, <INSTANCE_TYPE> with the desired EC2 instance type (e.g., t2.micro), <KEY_PAIR_NAME> with the name of an existing key pair, and <SUBNET_ID> with the ID of the subnet within the default VPC where you want to launch the instance
Wait for the bucket to be created. You can check the status using the following command:
aws s3api list-buckets
Once you see your bucket listed, it means it has been successfully created.
That's it! You have now launched an EC2 instance and created an S3 bucket using the default VPC through the AWS terminal.
